Quantcast
Channel: Telerik Blogs | .NET
Viewing all 1954 articles
Browse latest View live

Blue Mockingbird Vulnerability Picks up Steam—Telerik Guidance

$
0
0

The Blue Mockingbird malware attack, which is compromising the security of many web applications, including Microsoft Information Services, SharePoint and Citrix, is also targeting old Telerik UI vulnerabilities that have already been fixed.

The attack often uses the known vulnerabilities CVE-2017-11317 and CVE-2019-18935 to upload and execute the malicious software to versions that have not been upgraded to the latest version of the Telerik UI for ASP.NET AJAX (also known as RadControls for ASP.NET AJAX).

Both of the vulnerabilities are already fixed, and, when they were found, Progress notified all of our active and inactive customers with instructions and mitigation steps so they could secure their apps. See the following blog posts:

Am I Vulnerable?

You can see whether your app is vulnerable by opening its web.config and looking for the type="Telerik.Web.UI.WebResource" handler.

If you have either of the handlers below registered (make sure to look for the type attribute), you are using the Telerik UI for ASP.NET AJAX (Telerik.Web.UI.dll) suite and your app might be vulnerable to CVE-2017-11317 and/or CVE-2019-18935, and you should keep reading.
  <system.web>
    <httpHandlers>
      <add path="Telerik.Web.UI.WebResource.axd" type="Telerik.Web.UI.WebResource" verb="*" validate="false"/>
    </httpHandlers>
  </system.web>
  <system.webServer>
    <handlers>
      <add name="Telerik_Web_UI_WebResource_axd" path="Telerik.Web.UI.WebResource.axd" type="Telerik.Web.UI.WebResource" verb="*" preCondition="integratedMode"/>
    </handlers>
  </system.webServer>

How to Prevent the Vulnerability?

To make sure you are not vulnerable we recommend that you upgrade to R1 2020 or later, as shown in the diagram below:

Security diagram

You can find more information in the following dedicated articles:

Which Telerik Version am I Using?

There are three easy ways to check the version of the Telerik.Web.UI.dll assembly, which is the main file of the Telerik ASP.NET AJAX suite:

  • For ASP.NET WebApplication types of projects, open the csproj file and search for “Telerik.Web.UI” - the path in the HintPath will show you the location of the Telerik.Web.UI.dll file
    <Reference Include="Telerik.Web.UI">
              <HintPath>\bin\Telerik.Web.UI.dll</HintPath>
             …
           </Reference>

    Once you have the path from the HintPath, navigate to the Telerik.Web.UI.dll in Windows Explorer, right click, choose Properties -> Description tab and find out the version in the File Version row:

    Telerik.Web.UI.dll Properties 

  • For ASP.NET WebSite types of projects, go to the bin folder of the web project and right click on the Telerik.Web.UI.dll -> Properties -> Description -> see the version in the File version line.
  • Inspect the version in the GAC as explained in the Referencing Assemblies from the GAC article

Feedback and Questions

If you have any questions you can reach out the Telerik support via the public Telerik ASP.NET AJAX forum, by opening a General Feedback ticket or via the support ticketing system (for everyone with an active subscription).


Telerik UI for Blazor 2.15.0 Includes New ButtonGroup, ToggleButton, Grid Updates and More

$
0
0

The latest release of Telerik UI for Blazor features new native components in ButtonGroup and ToggleButton, updates to the Grid, Chart, Treeview and More. Read on for all the highlights.


It is June and here comes another release of Telerik UI for Blazor that brings two new native Blazor components—Button Group and Toggle Button—multiple new features to the Grid, Chart, TreeView, Textbox and more. Let’s dive into the new 2.15.0 release and see in detail the new goodies including new Grid Custom Filtering, Grid Row-Click Events, support for dynamic ExpandoObject, and binding to DataTable, all ready to be plugged and played in your Blazor Server and WebAssembly apps!

New Blazor Components

Blazor Button Group Component

ButtonGroup Overview

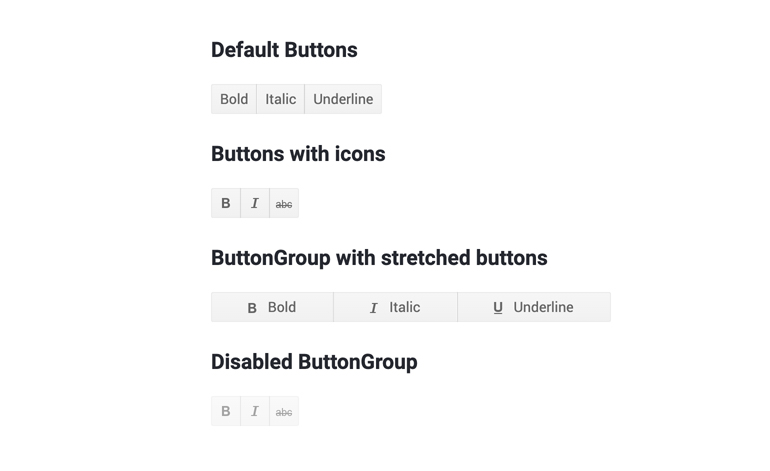
The ButtonGroup component is a UI container for buttons, which lets you select single or multiple button instances, and respond to the selection and click events. The buttons within the ButtonGroup fill up the container, match the styling according to the chosen theme and provide the common button features like images and icons, as well as other parameters and attributes.
Telerik UI for Blazor ButtonGroup Component

Telerik UI for Blazor ButtonGroup Component

To use the ButtonGroup component in your Blazor applications, you need to add the TelerikButtonGroup tag, and inside it add the corresponding <ButtonGroupToggleButton> or <ButtonGroupButton> tags that denote each button, as shown in the example below:

<TelerikButtonGroup>
<ButtonGroupButton>First button</ButtonGroupButton>
<ButtonGroupToggleButton>Second button</ButtonGroupToggleButton>
</TelerikButtonGroup>

ButtonGroup Selection

Using the SelectionMode setting of the ButtonGroup component, you can enable single or multiple selection of its ButtonGroupToggleButton instances.

ButtonGroup Customization and Styling

You can customize and style the ButtonGroup and its individual buttons using various styles, images, sprites, font icons and conditional formatting. Check out an example of how to completely transform a button group look.

ButtonGroup Events

The buttons in the ButtonGroup component provide two handy button/toggle button events:

  • OnClick fires when the user clicks or taps the button. You can use it to invoke async logic such as fetching data or calling a service.
  • SelectedChanged fires when the user changes the state of the button by clicking it (or by using Space or Enter). You can use it to call local view-model logic (applicable for a ButtonGroupToggleButton)

ButtonGroup Keyboard Navigation

The ButtonGroup component has built-in keyboard navigation allowing end users to easily navigate in Blazor applications, focus and click on buttons using their keyboard.

Blazor Toggle Button

ToggleButton Overview

The ToggleButton lets you perform a toggle actions (such as on/off) on the two states of the component.

Telerik UI for Blazor ToggleButton Component

Telerik UI for Blazor ToggleButton Component

To add a Telerik UI for Blazor ToggleButton to your Blazor app, use the <TelerikToggleButton> tag.

<TelerikToggleButton @bind-Selected="@IsSelected">
Selected: @IsSelected
</TelerikToggleButton>
@code {
boolIsSelected { get; set; }
}

ToggleButton Styling

You can use an image, sprite or font icon in the toggle button so that you customize its look and make it easier for users to interpret its purpose.

ToggleButton Events

The ToggleButton component exposes the following events to let you handle clicks and selection in Blazor apps.

  • OnClick fires when the user clicks or taps the button. You can use it to invoke async logic such as fetching data or calling a service
  • SelectedChanged fires when the user changes the state of the button by clicking it (or by using Space or Enter). You can use it to call local view-model logic

ToggleButton Keyboard Navigation

Like most of the Telerik UI for Blazor components, the ToggleButton has built-in keyboard navigation allowing end users to easily focus and click on buttons using their keyboard.

Blazor Components Enhancements

With every new version that we ship with Telerik UI for Blazor, we aim to give our love to the Grid component, and in the 2.15 release we added several features requested via our feedback portal.

Blazor Grid Component New Features

Grid Custom Filter

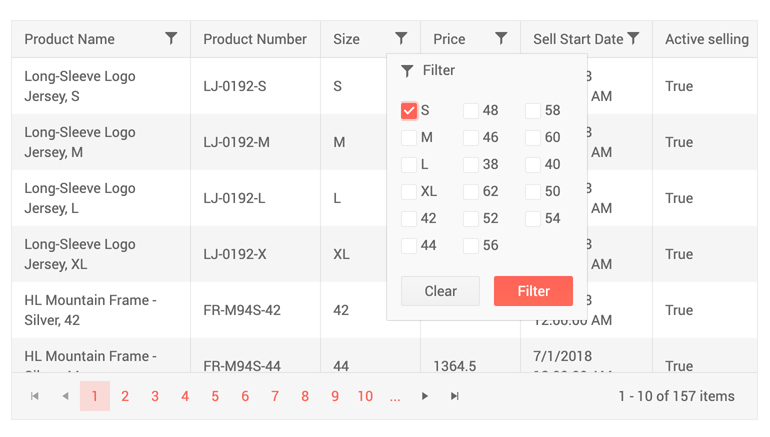
When working with data one thing is sure—it grows, and users needs to be able to quickly find their relevant records. And because filters do not always come in their simple form such as show me records for data smaller than DateTime.Now, in this release we added the flexibility to let you customize data filtering.
Telerik UI for Blazor Grid Custom Filtering - Multiple Operands

Telerik UI for Blazor Grid Custom Filter Menu—Apply Multiple Operands

You can apply as many logical operands as needed and implement any custom filtering criteria that is defined by your project requirements using the filter menu template.

Telerik UI for Blazor Grid Custom Filtering - Checkboxes

Telerik UI for Blazor Grid Custom Filter Menu—Apply Multiple Checkbox with Filter Menu Template

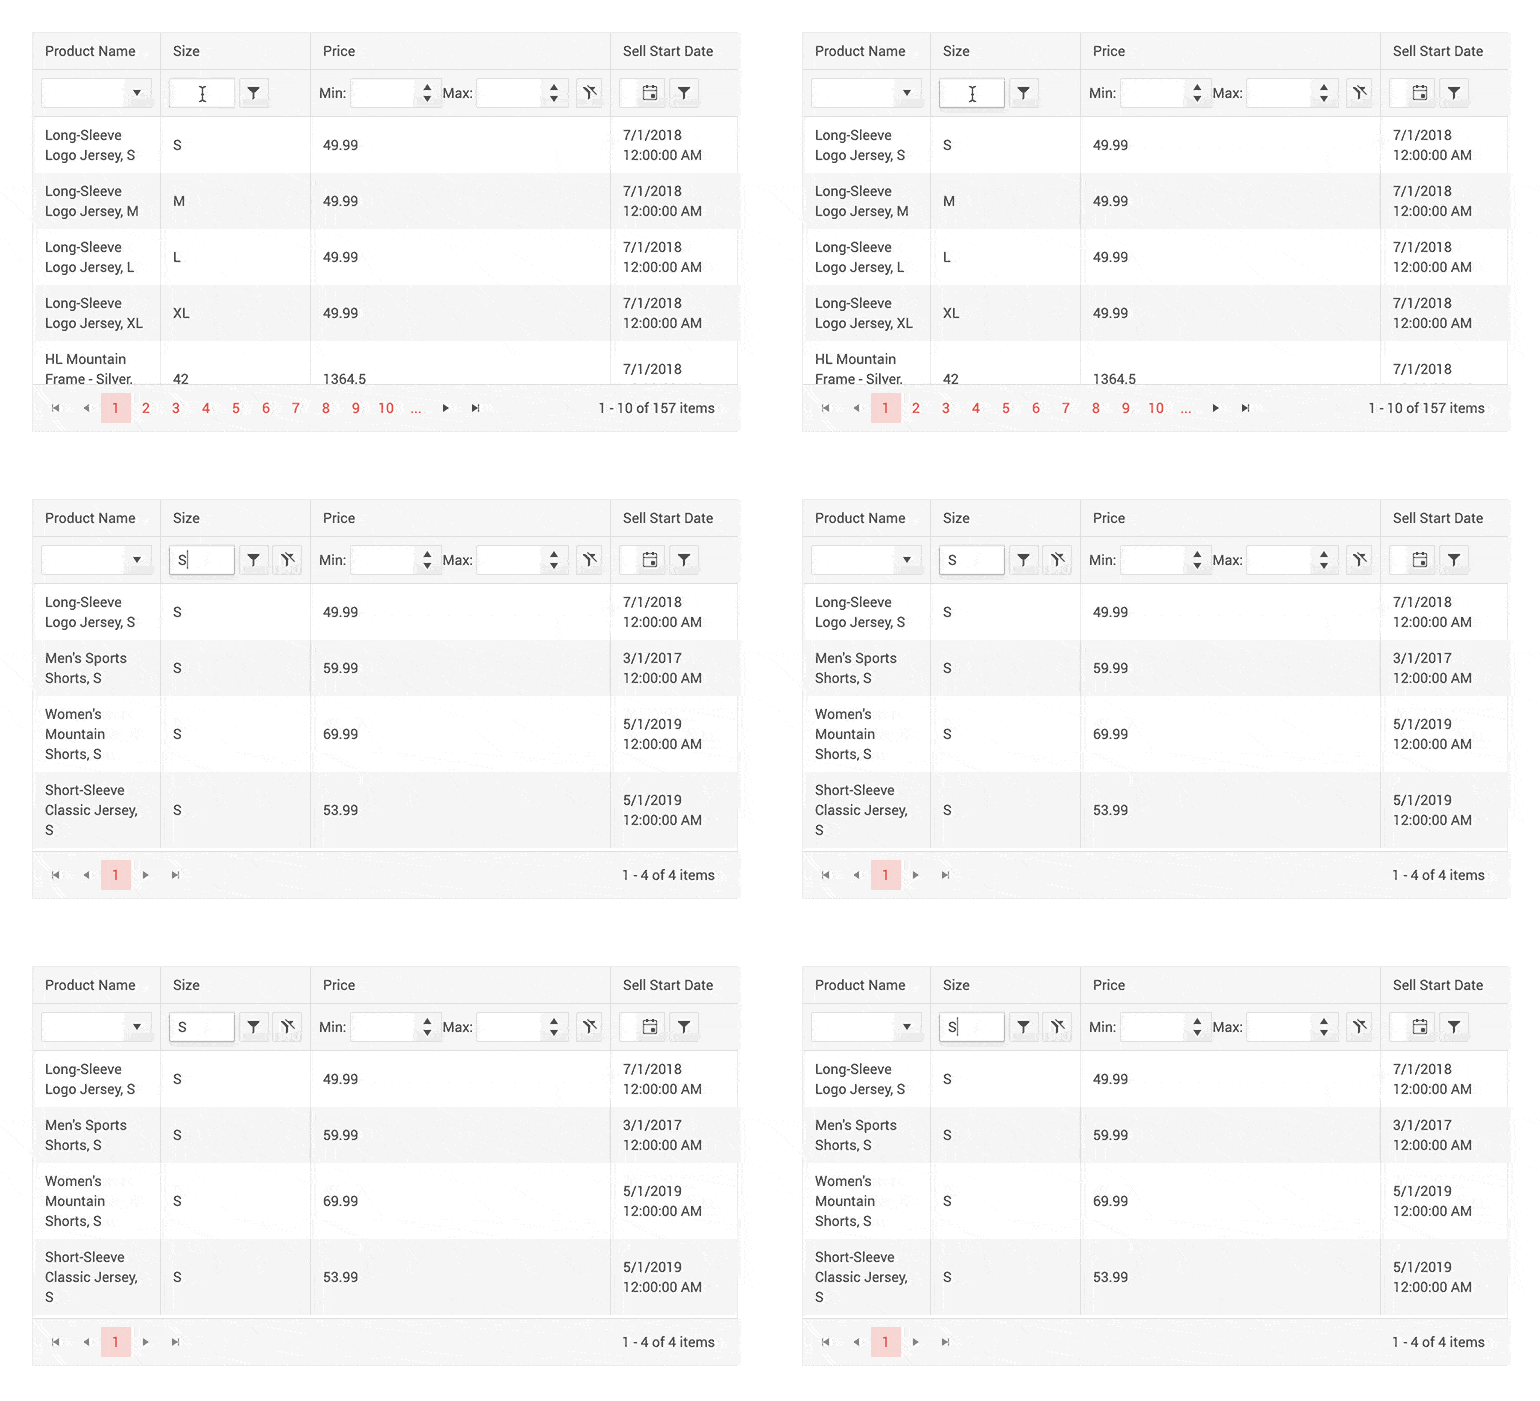
In addition to the Grid custom filter menu, you can also implement custom filtering on Grid rows using the filter cell template.
Telerik UI for Blazor Grid Custom Filter Row

Telerik UI for Blazor Grid—Custom Row Filter

Code examples on how to customize filtering using the <FilterMenuTemplate> and <FilterCellTemplate> templates can be found on our dedicated custom filtering demos for menu and rows.

Grid Row Click Events

We have exposed two new events in the Grid, so that you can implement custom business logic in your code that handles user clicks on Grid rows.

OnRowClick and OnRowDoubleClick events fire when user clicks and double-clicks a Grid row, respectively. Their event handlers receive the GridRowClickEventArgs object, providing the model of the clicked row in the Item field giving you flexibility to show details, load data on demand, display related data and perform various custom actions to the clicked rows.

Grid Support for ExpandoObject

Don’t have a strongly typed model of your data—no problem, the Telerik UI for Blazor Grid can easily accommodate dynamic data types. Checkout our sample repo on how to bind Grid to ExpandoObject in Blazor apps.

Bind Grid to DataTable

For those of you that have backend returning DataTable, you can now bind the Grid to DataTable data and have all the cool Grid built-in features with ease—sorting, paging, filtering and even editing.

Check out an example of how to bind the Grid in Blazor applications to a DataTable.

Blazor TextBox Component New Features

Textbox Additional Parameters

The latest updates to the Textbox component allow you to easily customize multiple elements of the text input, such as: AutoComplete, Placeholder, Name, Title and TabIndex.

<TelerikTextBox Name="email"PlaceHolder="john@smith.com"TabIndex="3"InputMode="email"Id="email"AutoComplete="on"Width="180px"></TelerikTextBox>

Textbox Password

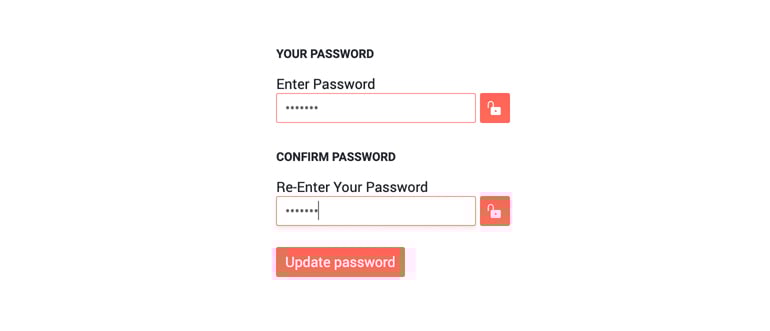
The Textbox component now has new parameter, Password, which when set to true gives you the option to mask the characters in the input and give it a proper password look.

Telerik UI for Blazor TextBox Password Property

Telerik UI for Blazor Textbox Password Property

Blazor TreeView Component New Features

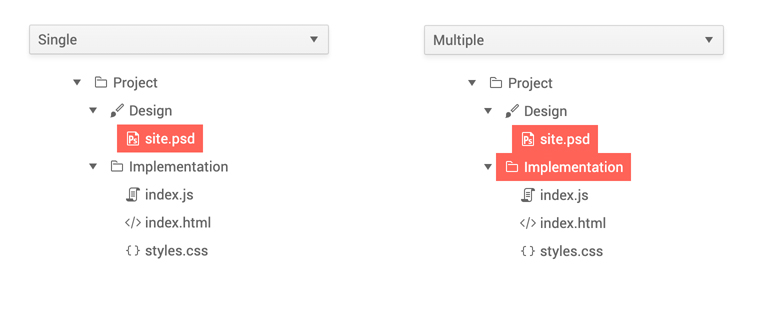
TreeView Selection of Nodes

The TreeView component node selection can be configured by setting the SelectionMode parameter to a member of the TreeViewSelectionMode enum, which takes one of the three options:

  • None—disable the node selection (default)
  • Single
  • Multiple (using Ctrl or Shift key)

Telerik UI for TreeView Node Selection

Telerik UI for Blazor TreeView Selection of Nodes

TreeView Node Click Events

Two new events have been added to the component to enable flexibility when selecting and working with the TreeView nodes:

  • OnItemClick—fires when the user clicks (or presses Enter) on a node (item) of the TreeView.
  • SelectedItemsChanged—the SelectedItemsChanged event fires when the selection is enabled and the user clicks on a new item.

Blazor Chart Components New Features

Chart Tooltips

You can enrich your Blazor charts with three out-of-the box Chart tooltip-ingoptions for data points:

  1. Specific tooltip for each <ChartSeries>
  2. Common tooltip for all chart series
  3. Or a shared tooltip which provides summarized information of all data points from the hovered category

To enablespecific tooltips for the data points of each individual series, you need to include the <ChartSeriesTooltip> tag inside the <ChartSeries> tag, and set its Visible parameter to true.

To enable the same tooltip for all chart series, add the <ChartTooltip> tag inside the <TelerikChart>, and set its Visible parameter to true.
Telerik UI for Blazor Chart Tooltip - Single

Telerik UI for Blazor Chart Single Tooltip

To enable the shared tooltip in Telerik UI for Blazor Charts, add the <ChartTooltip> tag inside the <TelerikChart> tag, and set its Shared and Visible parameters to true.
Telerik UI for Blazor Chart Tooltip - Shared

Telerik UI for Blazor Chart Shared Tooltip

Telerik UI for Blazor Chart tooltips allow full customization of their appearance: background, color etc. and the content that is rendered in the tooltip via templates/ shared templates.

Both the chart tooltip Template and SharedTemplate allow you to define custom business logic, render HTML and give you access to the context parameter. In the Template it provides information about the current data point such as: CategoryIndex, SeriesIndex, SeriesName, DataItem, FormattedValue, and in the SharedTemplate it exposes Category (renders the name of the Category) and Points (a collection of data for each series data point in this category).

Click Event on a Chart Element

And to make things more interactive, the Telerik UI for Blazor Chart component exposes events that let you handle user clicks on chart series.

Check out the OnSeriesClick event with Telerik UI for Blazor charts.

Download Telerik UI for Blazor 2.15.0

To see in action all that’s mentioned in the release blog post, head over to the Telerik UI for Blazor page, download the 2.15.0 version of Telerik UI for Blazor to spice up your Blazor applications. Keep telling us what’s working well, what needs to change and what you’d like to see next in the dedicated Blazor feedback portal or in the comment section below!

Thank You!

As always, the entire team working on Telerik UI for Blazor at Progress is thankful to you for being involved and helping us grow and making Telerik UI for Blazor bigger and better.

Grab Your Users' Attention with the WPF RadCallout in Action

$
0
0

Need to display meaningful information, be it alerts, hints, tips, etc? Then greet the hero of R2 2020 Release of Telerik UI for WPF—the RadCallout control.

Remember how we all thought that buttons are everywhere? Well, while developing the hero of today’s talk, I changed my mind about that. I started seeing Callouts everywhere, but there was no other like our star—one of the shiniest accents of the R2 2020 release of Telerik UI for WPF. Everybody, please welcome the brand-new RadCallout.

I’m sure that all of you have already met a callout in your lives, at least once. Some of you may not know that it’s referred to as a callout. Others might relate it to the thought or speech bubbles used in comic strips. All golden Microsoft Office fans surely still remember Clippit. The cute cartoon paperclip, seen in versions 2000 through 2003, and its helpful callouts. But what’s so special about ours? Let’s call out the RadCallout and find out.

RadCallout

What do you see? A tiny, fluffy, cloudy text box with a small tail that you can point to different locations. Pretty simple, huh, yet so satisfying and unbelievably (at first sight) powerful. Let me guide you through its superpowers.

Unlimited Box Shapes Variety

I could not help but start exactly with this one. Since the callout control is a content control, designed to display a piece of meaningful information, be it alerts, hints, tips, etc., I believe the shape of it is the part responsible for the best representation. You can’t warn your users that if they don’t change their expiring password, they may not be able to log in ever again, in the shape of a heart for example, can you? Let’s cut the small talk and explore the shape options that the RadCallout offers.

The control comes with five built-in shape types, plus one very special option. The CalloutType is an enumeration and it allows the following values—Rectangle, RoundedRectangle, Ellipse, Cloud, Kaboom (the one jazzy, glaring shape with the many lines connecting to form numerous triangular edges).

The last option is intentionally out of the list of built-in shapes—it's the Custom shape option. The one responsible for the heading of this section, the one giving you the un-limitedness. Using it, you need to provide a custom geometry. I really love it, because it allows you to get into your stride and build a very cool and unique shape for your callout.

Callout Shapes (ColorThemeGenerator)

Explore them all and play with the themes and colors in the Color Theme Generator application. Like the rest of the controls from the Telerik UI for WPF, the Callout control comes with a set of themes you can use to create a consistent and modern looking user experience.

P.S. The last one of the custom callout types is catchy, isn’t it? And since I like you, I’ll show you how it’s done:

<telerik:RadCallout
Width="250" Height="170"
Margin="10 0" CalloutType="Custom"
MeasurePathWithInfinity="False" Stretch="Fill" ArrowType="None"
Geometry="M590.7,100.7c.5-3.1,1.1-6.2,1.8-9.3a2.0,2.0,0,0,0-.7-2.4c-7.4-5.7-15.8-9.0-25.4-8.2-10.5,1-18.5,6.0-23.2,15.7-3.7,7.8-3.8,16-2,24.3a2.3,2.3,0,0,0,1.7,1.7c2.1.8,4.3,1.7,6.3,2.7a30.7,30.7,0,0,1,7.2,4.7,6.4,6.4,0,0,1-1.9-.3,86.4,86.4,0,0,0-17.4-3.3c-8.5-.6-16.8.1-24.6,3.6-9.3,4.2-15.8,11-18.3,21.1-2,7.9-.8,15.5,2.4,22.9,3.7,8.0,9.6,14.2,16.8,19.2,2,1.4,4.1,2.6,6.1,3.9,5.2-3,10-6.1,15.5-7.8a7,7,0,0,1-1.2,1.3,110.6,110.6,0,0,0-8.0,7.8c-7.5,8.8-11.2,19-10.1,30.7,1.5,16.1,13.5,30.8,29.7,36.0a47.3,47.3,0,0,0,30.4-.5,44.6,44.6,0,0,0,9.6-4.2,60,60,0,0,1-2.4-18.3,11.0,11.0,0,0,1,1,2.1c1.2,3,2.2,6.1,3.7,9.1a48.5,48.5,0,0,0,14.8,18.5c9.7,7.2,20.5,9.9,32.4,7.1,12.4-2.9,21-10.4,25-22.7a36.1,36.1,0,0,0,.5-19.4c-.7-3.1-1.9-6.1-2.9-9.2h0c.8-.5,1.3.1,1.8.6,1.6,1.7,3.2,3.4,4.8,5.3a2.9,2.9,0,0,0,2.8,1.3A71.5,71.5,0,0,0,686.7,231c10-3.7,18.2-9.8,24.1-18.9,7.5-11.7,9.4-24.6,6.6-38.2-3.4-16.1-12.3-28.2-27.0-35.8a53.1,53.1,0,0,0-23.6-5.5c-1.3,0-2.6,0-3.9,0a1.9,1.9,0,0,1,1.0-1.1c3.6-1.2,7.3-2.6,11.1-3.7,1.3-.4,2.0-.9,2.1-2.3.1-2.3.5-4.7.6-7.1.4-9.6-1.2-18.8-6.3-27.1-8.0-13.1-20-19.4-35.4-18.5-8,.4-15.2,3.3-22,7.5-8.5,5.3-15.5,12.4-21.6,20.5-.4.6-.9,1.2-1.7,2.2A13.1,13.1,0,0,1,590.7,100.7Zm-63.8,17.7L477,72.3a13.9,13.9,0,0,0-1.5-1c1.0-.5,1.6.3,2.2.8q10.5,7.7,21.0,15.4l34,25a6.3,6.3,0,0,0,2.4,1.2c-.2-.7-.4-1.4-.6-2.2-2.1-6.3-3-12.8-1.2-19.3,2.4-9,8.2-15.1,16.8-18.4,13.3-5.1,25.8-3,37.5,5.1.6.4,1.2.9,2.3,1.6,1.8-21.2,3.3-42.1,5.5-63,1.3,20.5,2.7,41.1,4.1,62.2,1-.8,1.6-1.3,2.2-1.8,8.1-7,17.4-12,28.1-13.5,15.8-2.2,29.7,1.7,40.9,13.3,7.7,8,11.2,17.9,11.5,28.9.0,3-.3,6.0-.5,9.0-.0.8-.1,1.7-.2,2.9,1.1-.4,2-.8,2.8-1.2l78.2-35.9c.9-.4,1.9-.7,2.9-1.0a30.6,30.6,0,0,1-2.6,1.9q-37.2,21.6-74.5,43.1c-.8.4-1.6,1-2.7,1.6a9.8,9.8,0,0,0,1.4.5c18.6,3.7,31.1,15,38,32.3a59.9,59.9,0,0,1,0,45.6c-5.6,14.1-15.8,24-30.1,29.3a60.4,60.4,0,0,1-17.0,3.7c-.8.0-1.6.1-2.8.3.5.7.9,1.3,1.3,1.7q21.2,25.6,42.6,51.2a10.1,10.1,0,0,1-2-1.2Q695.6,271,674,250.7l-4.8-4.4c-.7.8-.4,1.7-.4,2.5a38.8,38.8,0,0,1-4.8,19.8,39.8,39.8,0,0,1-21.0,18,44.7,44.7,0,0,1-35.7-.7,38.3,38.3,0,0,1-15.4-12.5c-.3-.4-.6-.9-1-1.3a3.9,3.9,0,0,0-.7-.4c-5.7,27.5-11.1,55.0-17.1,82.5,2.6-28.3,5.2-56.6,7.8-85.2a10.6,10.6,0,0,0-1.5.6c-11,7.2-22.7,8.2-34.9,4-16.4-5.7-28.1-16.7-34.6-33a37.3,37.3,0,0,1,0-29c.5-1.3,1.2-2.5,2-4.3l-61.9,17.3c-.0-.1-.1-.2-.1-.4l63.2-27-3.5-2a55.6,55.6,0,0,1-18.8-16.6c-13-18.6-6.8-43.2,13.3-53.6a44.4,44.4,0,0,1,21.5-4.8c.7,0,1.4,0,2.1,0,.1,0,.2-.1.6-.2C527.5,119.2,527.2,118.8,526.8,118.4Z">
    <telerik:Label Content="CalloutType - Custom, ArrowType - None" FontSize="10" Margin="0 0 0 15"/>
</telerik:RadCallout>

Customization Capabilities

Don’t be shy and always aim beyond the basic settings like spacing, background and border color. Of course, the RadCallout allows it. Adjust everything you wish to end up with the perfect callout for your app. Don’t just change text color and style, or the vertical and horizontal offsets.

Be brave, play with the properties which determine the look and feel of the connection point for the callout body—the arrow. Check out the following properties:

  • ArrowBasePoint1—the first base point of the arrow geometry
  • ArrowBasePoint2—the second base point of the arrow geometry
  • ArrowAnchorPoint—the anchor point of the arrow geometry

So far, so unclear, but let me try to explain.

The above properties for customizing the arrow of the RadCallout’s geometry are all of type Point, representing relative coordinates (between 0 and 1). For example, X = 0 and Y = 0 means the top-left point of the callout body and X = 1, Y = 1 - the bottom-right point. In the following figures you can see the default values of the properties [0.25, 0.5], [0.75, 0.5] and [0.5, 1.25].

Important thing! The width and height of the callout applies only to the body of the geometry, without the arrow. Why? Because this makes it very easy to keep a fixed size of the main shape, while making bigger arrows which exceed the shape size. How to make those bigger arrows—simply set big Y of the ArrowAnchorPoint. To make the arrow included in the callout size, you can set MeasurePathWithInfinity property to False.

Arrow Points Defaults

Default Arrow Point Coordinates

Arrow Points Custom

Custom Arrow Point Coordinates

The Red, Green and Blue points in the figures are not part of the control. Demonstrative purpose only.

Usage Options

XAML Usage

We’ve already stepped into the possible ways of using the RadCallout in a WPF app. In the above code snippet with the custom geometry, I demonstrated the XAML declaration of the control. The choice of a parent container in this case is completely in your hands—choose the best one for displaying your content in the most relevant way.

Now, I want to dig deeper into the other possibility. Showing the callout in an animated Popup, using the CalloutPopupService class.

Popup Usage

Want to show the callout above your application content and enable interaction via actions such as clicking, hover, keyboard navigation, etc.? Sure, then the CalloutPopupService class will be of great help as it provides the needed methods and events to do so. Use it for showing the callout, closing a given callout, closing all callouts at once and disabling the popup animation. Believe me, this is just a brief intro into this wonderful option. This service class goes together with the CalloutPopupSettings class.

The CalloutPopupSettings class has a really long list of powerful properties that you could benefit from to completely configure the popup up to your liking. You can choose whether the popup will be auto centered, or auto closed, should it move with the parent placement target window, should it show in the intended placement position in case of exceeding the monitor boundaries.

Of course, I should’ve started with the Placement options, represented by the PlacementMode enumeration, allowing the following values—Absolute, Relative, Bottom, Center, Right, AbsolutePoint, RelativePoint, Mouse, MousePoint, Left, Top, Custom.

Animation configuration options are also worth mentioning as they greatly contribute to the customization capabilities of the control. I’ll even put them in a separate section, coming right up… or actually down.

Whoa, that was a long list represented quickly… (for such a tiny at first sight control).

Callout Popup Animations in Action

If you are already intrigued by the popup service, make sure to play around with the animations to achieve the best experience for the end users. I will be more than glad to guide you through it.

When setting up the animation of your callout popup, you can choose from the CalloutAnimation enumeration. It allows the following values: None, Fade, Move, FadeAndMove, Reveal, FadeAndReveal, Scale, FadeAndScale.

You can specify different animation types for the callout popup by using the ShowAnimationType and CloseAnimationType properties. Also, you can be the one in control for the durations of these animations, as well as their delays.

In case you’ve missed the blog post for the R2 2020 release of Telerik UI for WPF, I’ll drop the GIF, showing the animations in action:

Callout Popup Animations

From Intro to Epilogue in a Blink

This has already started to look like a whole introduction of a book, so I think it’s time to close the curtains on this lovely blog. But… before this.

When using the RadCallout (I’m sure you will), think of it as your best helper for making it easy to highlight important information. Use it to alert customers to a special discount, highlight a testimonial or add weight to particularly important text content. Spotlight free shipping, discounts, price matching and more. Draw attention to unique selling points and important product details and benefits. Whatever you like. Just use it wisely to make your application content stand out.

Speaking of wisdom, the best thing would be to benefit from the outstanding possibility to integrate the Callout control with other UI controls from the Telerik UI for WPF such as Maps, Charts, Tooltip, Slider, etc. For some of those integrations (as well as others), make sure to check the documentation and the awesome control examples in our WPF demos application.

Share Your Feedback

We will never get tired of encouraging you to share your thoughts with us by dropping us a comment below, or using the Feedback portal about UI for WPF, because we highly value your honest feedback. It really matters!

In case you haven’t already done so, do not hesitate to try out the latest:

Try Telerik UI for WPF

Time to Boost Your HamburgerMenu! Multi-Level Items Have Arrived

$
0
0

The new version of Telerik UI for WPF's HamburgerMenu recipe is here. The RadNavigationView now supports UWP-like multi-levels! Learn how to achieve a hierarchical menu.

Remember how I deliberately let the secret about mastering the navigation within your WPF apps just slip? I did not hesitate a minute to share with you the recipe of our HamburgerMenu. But you know what—I like making my favorite recipes taste better every time. That’s why I’m so thrilled to announce the new stuffing of this one. Let me introduce you to the multi-level hierarchy support of RadNavigationView!

Since the R1 2019 Release, when the first version of the HamburgerMenu recipe was created, a lot of requests and feedback was received. I am so grateful for that. Thanks to all of you, looking for multi-level items (like in UWP), the RadNavigationView control now supports it! Let me show you how to achieve hierarchical menu visualization.

Setting Up Hierarchy

Each RadNavigationViewItem element now has an Items collection. It can be populated with numerous RadNavigationViewItem elements, thus allowing multilevel items definition. XAML lovers, check it out below:

<telerik:RadNavigationView PaneHeader="Mail"> 
<telerik:RadNavigationView.Items>
<telerik:RadNavigationViewItem Content="Accounts">
<telerik:RadNavigationViewItem.Items>
<telerik:RadNavigationViewItem Content="Viktoria Grozdancheva (vgrozdancheva@prgs.com)" />
<telerik:RadNavigationViewItem Content="John Doe (jdoe@prgs.com)" />
</telerik:RadNavigationViewItem.Items>
</telerik:RadNavigationViewItem>
<telerik:RadNavigationViewItem Content="Folders">
<telerik:RadNavigationViewItem.Items>
<telerik:RadNavigationViewItem Content="Inbox"/>
<telerik:RadNavigationViewItem Content="Drafts"/>
<telerik:RadNavigationViewItem Content="Sent Items"/>
<telerik:RadNavigationViewItem Content="Deleted Items"/>
</telerik:RadNavigationViewItem.Items>
</telerik:RadNavigationViewItem>
</telerik:RadNavigationView.Items>
</telerik:RadNavigationView>

Data Binding lovers, don’t you be worried. The HamburgerMenu can also be populated with business objects via its ItemsSource property. The DisplayMemberPath and ItemContainerStyle properties can be used to further customize the items and allow sub-items. Check the Hierarchical Data Binding article of the control for more information and examples.

So much talking and not a single preview of the menu’s multi-levels in action… Shame on me.

NavigationView Multi-Levels GIF

P.S. This awesome GIF is not a preview of the first code snippet, it’s from our precious Telerik UI for WPF Controls Demo application. Don’t hesitate to check it out and play with the Sub Items demo of the NavigationView control.

Oh, one thing that's worth noticing about the GIF is that when I click directly on the expand/collapse icon, the item does not get selected—this way only the expanded or collapsed state is triggered. Clicking everywhere else in the bounds of the item will trigger its selected state. Thought you might want to know it .

Customization Capabilities

The NavigationView sub-items are totally tailor-made to meet your business needs. Let’s peek at the benefits of the hierarchical hamburger menu together.

Expand/Collapse Icons

First thing that I’d like to be in control of are the expand and collapse icons, of course. For this purpose, the ExpandedIcon and CollapsedIcon properties of the RadNavigationViewItem come in handy. The default icon template of the item uses RadGlyph, so you can set the properties to a glyph string from the glyphs reference sheet. My favorite cheat-sheet.

Oh, you can also experiment with the expand/collapse animations if you dare!

Nested Items Indentation

All child items can have a different than the default horizontal offset (indent). Simply set the SubItemsIndentation property of RadNavigationView to the desired value and you’re all done. You can play with this one using the Configurator part of the Sub Items demo that I mentioned a few lines above.

Single/Multiple Expanded Items

The default behavior of the RadNavigationView allows expanding multiple RadNavigationViewItem elements with child items at once. Need to restrict that to only a single expanded item at a time? Sure, just set the AllowMultipleExpandedItems property of RadNavigationView to False.

Flying Out to NavigationView’s Flyout

What about having a collapsed pane and the NavigationView is in its Compact or Expanded DisplayMode? Where do all nested menu items go?

Sub-Items Flyout

That’s right, they fly out to the east coast of the pane . Now, seriously, clicking on a parent item displays its children (the collapsed RadNavigationViewItems) in a flyout which has a nice animation by the way to make sure the flight is smooth.

Some of you asked for direct access to the sub-items on hovering over a main menu entry. This can be achieved by changing the default ClickMode of the parent item to Hover. Easy-peasy.

Sub-Items Events

A few words about the events that are fired when expanding and collapsing the items. These actions fire the ItemExpanded and ItemCollapsed events of RadNavigationView. Additionally, the RadNavigationViewItem exposes Expanded and Collapsed events, which are fired before the previous two.

Closing Words

You know I’m only human and might have missed something which you consider important. Therefore, don’t forget to check out the Hierarchy and Hierarchical Data Binding articles of the NavigationView as well.

Okay, that’s it, guys. Thanks for taking your time to read my blog! I hope the multi-level hierarchy support of the HamburgerMenu met your expectations and you’re eager to:

Get the Latest Telerik UI for WPF

I’m sure you’ll try it out. And when you do, I’ll be there to read your honest feedback. Don’t be shy to share it in the comment section below or head to our Feedback portal.

Happy coding and to make it even happier, explore all new controls, features and improvements of the R2 2020 release of Telerik UI for WPF.

New FREE Ebook: A Quick Guide to Expert .NET Reporting Tools

$
0
0

Visualizations have been helping people understand data for centuries. Clear and accurate reporting tools play a pivotal role in any business decision today and help companies digitize and streamline their reporting process.

Today’s data visualization tools, also called reporting tools, go beyond the standard charts and graphs used in the earlier periods. They can display data in more sophisticated ways such as infographics, dials and gauges, geographical maps, heat maps, and detailed bar, pie, and other charts. This is due to the advancement of digital information in today’s business environment.

Business processes and people are moving information at incredible speeds thanks to the adoption of digital information. This has forced businesses to adopt digital workflows to exchange information quickly. An example of this might be stock brokerage or bank transactions are done all digitally with the only bottleneck being data transfer rates.

An organization like a bank or an accounting firm or any other company which uses data for business decisions requires reporting tools that meet specific criteria to operate these high-end digital workflows. A proper reporting solution is of the utmost importance to ensure streamlined processes and accurate information is delivered.

Our guide to expert .NET reporting tools was just published and it is ready for FREE download.

In this ebook, Eric Rohler, Senior Technical Engineer at Progress, offers a six-step framework to help you choose the best reporting tool for your organization. He reviews the main functionalities of reporting solutions and shares best practices for everything you need to know to deliver beautiful, powerful, interactive and reusable reports. 

Learn how to apply the top six criteria when assessing a reporting tool:

  • Presentation
  • Powerful
  • Productive
  • Pliable
  • Performant
  • Price

Deep dive in different stages of reporting—from report creation to styling to data sources to integration to rendering and accessibility. Take advantage of expert advice on successful integration between Reporting tools and web (Blazor, ASP.NET Core, ASP.NET MVC, ASP.NET WebForms, Angular, React and more) or desktop applications (WPF, WinForms, UWP) and many practical examples and use cases.

Download FREE Reporting Ebook

If you download the ebook, we’ll soon follow up with an invitation to a dedicated reporting webinar and more materials on the topic. Stay tuned!

Blazor vs React

$
0
0

A comparison of Blazor and React when it comes to modern web development—a review of the pros and cons. Does Blazor stack up?

Blazor WebAssembly (or Blazor Wasm, as all the cool kids are calling it!) has arrived, but how does it stack up compared to the other, more established options for building "modern" web applications?

Let's start with a comparison to React JS.

Specifically we'll explore how the following aspects work (for both frameworks):

  • Getting started
  • Building the UI
  • Passing data between components
  • Handling Forms
  • Routing
  • Fetching data from an API
  • Pros and cons of each

Before we dig in, it's worth noting this article focuses on Blazor Wasm, which runs in the browser using WebAssembly. That said, many of the points are equally valid if you're looking at using Blazor Server instead.

React—The Two-Minute Overview

React is a UI library which helps you build responsive, interactive user interfaces for your web-based applications.

Unlike frameworks such as Angular, React focuses purely on the component-building aspects of your app and doesn't tackle other concerns (like routing), preferring instead to leave it up to you to choose the best tool for your specific use case.

When you create a new React app, it will automatically bring in various packages it needs to work (using npm or its alternative, Yarn) and you can then bring in additional packages to handle things like routing, handling forms, making network requests.

You write your application using HTML (well, actually JSX but we'll get to that), CSS, and JavaScript.

To publish your app, you can run a command to bundle it up (using a bundler such as webpack), take the static bundled files (HTML, JavaScript, etc.) and deploy them to a web server.

When someone visits the deployed site, the browser JavaScript engine kicks in and runs your application code, rendering elements via the browser's DOM and handling various browser events (users clicking buttons, entering text in an input, etc.).

If you need to fetch data from a database or similar, you can make HTTP requests from your application to a server, which will return the data for your app to display.

How Does Blazor Compare?

Blazor is a framework which also enables you to build client web applications that run in the browser, but using C# instead of JavaScript.

When you create a new Blazor app, it arrives with a few carefully selected packages (the essentials needed to make everything work) and you can install additional packages using NuGet.

From here, you build your app as a series of components, using the Razor markup language, with your UI logic written using C#.

To publish your app, you can use .NET's built-in publish command, which bundles up your application into a number of files (HTML, CSS, JavaScript and DLLs) which can then be published to any web server that can serves static files.

When a user accesses your Blazor Wasm application, a Blazor JavaScript file takes over which downloads the .NET runtime, your application and its dependencies, before running your app using WebAssembly.

Blazor then takes care of updating the DOM, rendering elements and forwarding events (such as button clicks) to your application code.

Creating a New React App

By far the simplest way to spin up a new React application is to use "Create React App."

You need these commands:

npx create-react-app my-app
cd my-app
npm start

CRA also gives you easily accessed commands for bundling up your app ready for deployment.

Creating a New Blazor App

For Blazor, you can use Visual Studio or spin up a new project via the command prompt.

dotnet new blazorwasm
cd blazorwasm
dotnet run

You have a few other options, like the ability to include infrastructure for authenticating users, and whether to host your Blazor app in an ASP.NET web application, but the command above is the simplest option to get started.

Building Your UI with React

With React you build your applications as a series of components, using a declarative approach.

Here's an example:

import React, { useState} from 'react';

export default function Greeting() {
    const [name, setName] = useState();

    const nameChanged = (e) => {
        setName(e.target.value)
    }

    return (<>
        <label>What's your name?</label>
        <input type="text" onChange={nameChanged} placeholder="Bob"/>
        <span>Hello {name}</span>
    </>)
}

If you're not familiar with React, there's a little to unpack here.

React components are written using JavaScript.

Here we export a JavaScript function called Greeting.

This Greeting function represents a React component, and exporting it means we can easily reference this elsewhere in our app (so we can render it wherever we want).

Our Greeting function returns something which looks suspiciously like HTML but is actually JSX.

JSX is really JavaScript.

For example, when we declare span as JSX in a component, React will turn this into JavaScript which will be invoked to render the relevant HTML markup in the browser.

In practice, you can usually just write your JSX as if it were HTML and everything "just works!"

If you look at the input element, you'll notice we've declared an event handler for the onChange event. When you type something into this input, it will invoke our nameChanged function.

This will update the state of our component using something called hooks. Specifically we're using the UseState hook to update the value of name to whatever the user typed in.

Finally, in our span element we render the value of name resulting in a friendly personalized greeting for our user.

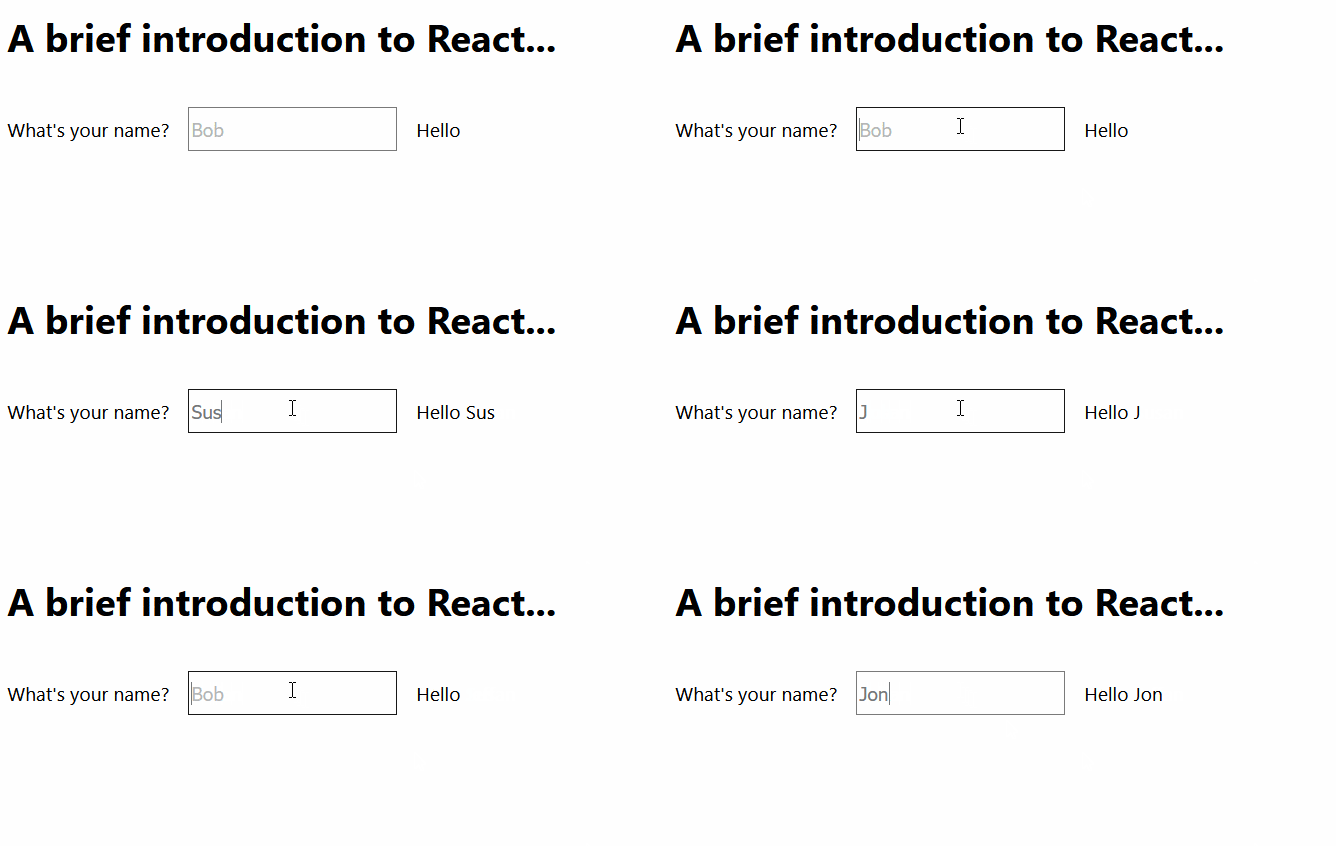
A form field asks "What's your name," and Jon has been entered. After that, it says, "Hello Jon"

As we change the value in the input, the greeting instantly updates to reflect the new value.

Generally speaking, everything you build in React revolves around components, which you can then render wherever you want, like this:

<h1>
    A brief introduction to React...
</h1>

<Greeting />

React example showing how typing name changes the greeting

In summary, a React UI:

  • Comprises one or more components
  • Is written using JSX (which takes your markup and data, and combines them together)
  • Runs as JavaScript in the browser

Building Your UI with Blazor

Blazor adopts a very similar approach to React in that you build your UI using components.

Where it differs is that you use Razor and C# (instead of JSX and JavaScript) to write your markup and UI logic.

<label>What's your name?</label>
<input type="text" @bind-value="Name" @bind-value:event="oninput" placeholder="Bob"/>
<span>Hello @Name</span>

@code {
    public string Name { get; set; }
}

This operates exactly the same way as the React example when you run it in the browser.

We've got roughly the same markup, but this time we have used Blazor's @bind syntax to bind our input to a property called Name.

When the user enters their name, the Name property will be updated with the value they enter.

By default, Blazor would update the value of Name on blur (when we clicked out of the text input) so we've added @bind-value:event="oninput" to make it update the property as soon as we start typing.

As with React you're now free to render this component wherever (and as often as) you like.

<h1>
    A brief introduction to Blazor...
</h1>

<Greeting />

Blazor example showing how typing in a name changes the greeting

In summary, a Blazor UI:

  • Comprises one or more components
  • Is written using Razor and C# (which takes your markup and data, and combines them together)
  • Runs on WebAssembly in the browser

Passing Data Around—React

There are two main "out of the box" approaches to handling state in your React components.

They can either interact with their own state (as we saw when we stored Name in our example), or they can accept data via props:

export default function Greeting(props) {
    const [name, setName] = useState();

    const nameChanged = (e) => {
        setName(e.target.value)
    }

    return (<>
        <h2>{props.headline}</h2>
        <label>What's your name?</label>
        <input type="text" onChange={nameChanged} placeholder="Bob"/>
        <span>Hello {name}</span>
    </>)
}

Here we've added a props argument to our Greeting function, and then rendered its value in our component via {props.headline}.

Now when we render this component, we can pass in a value for the headline.

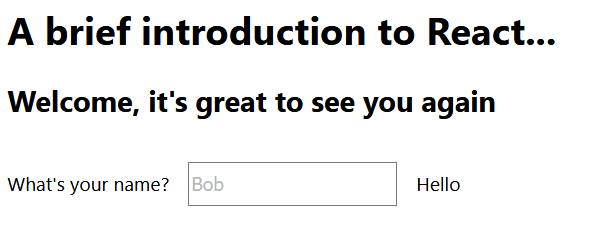
<Greeting headline="Welcome, it's great to see you again"/>

React example showing greeting with customized greeting

As you use React for real applications, these options for storing state can become a little unwieldy, with more and more state to pass around and/or store. This is where alternatives like Redux come into play, giving you a centralized data store for your entire application.

But it's worth noting Redux is not directly tied to React, and is not something you would necessarily use from day one when you start building React applications.

Passing Data Around—Blazor

Broadly speaking, Blazor has the same two primary options for managing state.

You can store data in the component itself using properties (as with Name in our example) or take data in via parameters.

<h2>@Headline</h2>
<label>What's your name?</label>
<input type="text" @bind-value="Name" @bind-value:event="oninput" placeholder="Bob"/>
<span>Hello @Name</span>

@code {    
    [Parameter]
    public string Headline { get; set; }

    public string Name { get; set; }
}

As with the React example, when you render Greeting you can pass in a headline and it will be rendered accordingly.

<Greeting Headline="Welcome, it's still great to see you..."/>

Handling Forms in React

React doesn't ship with anything to specifically help you with forms.

This means you need to either "roll your own" or use a third-party npm package for the job.

Here's the markup for a simple contact form.

return (
    <form onSubmit={handleSubmit}>
        <label>
            Name:
            <input type="text" value={name} onChange={handleNameChange} />
        </label>
        <label>
            Thoughts?:
            <input type="text" value={comments} onChange={handleCommentsChange} />
        </label>
        <input type="submit" value="Submit"/>
    </form>
)   

Note how we're setting the value of our inputs from state in our component (name and comments) and forwarding the onChange events to our own functions (handleNameChange and handleCommentsChange).

Here's what the JavaScript for this function looks like:

const [name, setName] = useState();
const [comments, setComments] = useState();

function handleNameChange(event){
    setName(event.target.value);
}

function handleCommentsChange(event){
    setComments(event.target.value);
}

function handleSubmit(event){
    // submit data to your server
    alert(`${name}: ${comments}`)
    event.preventDefault();
}

So we are effectively intercepting the normal behavior for the form to both read and update our own component state.

For validation you can either roll your own, writing logic to check the values set in the form and alerting the user if they are invalid, or lean on third-party libraries (typically brought in via npm).

Handling Forms with Blazor

By contrast, Blazor has built-in functionality to handle your form data and validation using something called EditForm.

Here's the markup for an equivalent form to our React example.

@using System.ComponentModel.DataAnnotations

<EditForm Model="FormModel" OnValidSubmit="HandleValidSubmit">
    <DataAnnotationsValidator />
    <label for="name">
        Name:
        <InputText id="name" @bind-Value="FormModel.Name"/>
    </label>
    <label for="slug">
        Thoughts?:
        <InputText id="comments" @bind-Value="FormModel.Comments"/>
    </label>
    <input type="submit" value="Submit"/>
    <ValidationSummary />
</EditForm>

In many ways this is similar to React, except we're using Blazor's InputText component for our input fields.

Technically it's entirely possible to use standard HTML elements and forms with Blazor, but using the built-in controls make certain things a lot easier (validation being one, as we'll see in a moment).

@bind-Value takes care of both reading the value from a field and updating it when a user types in a new value.

The form itself is based on a model of our choosing (where the form values will live) and we've told it which method to invoke when the form is submitted (and is valid).

Note how we've included a DataAnnotationsValidator and ValidationSummary; these components wire up the form to automatically respect any validation rules we set up on our model.

Here's the rest of the code:

@code {
    protected ContactUsModel FormModel { get; set; } = new ContactUsModel();

    async Task HandleValidSubmit()
    {
        // post to your API
        Console.WriteLine($"{FormModel.Name}: {FormModel.Comments}");
    }

    protected class ContactUsModel
    {
        [Required]
        public string Name { get; set; }
        public string Comments { get; set; }
    }
}

The ContactUsModel class could live anywhere in our project.

We have a FormModel property and HandleValidSubmit method.

When someone fills in the form, if they've met the validation rules (a Name has been entered) then HandleValidSubmit will be invoked.

Otherwise, the ValidationSummary will be used to show which fields have validation errors.

Blazor example of form with validation errors

Routing in React

As with forms, React (deliberately) doesn't ship with any built-in routing engine, leaving you free to choose which of various third-party routing options you want to use.

Notable options include "Reach Router" and "React Router."

Routing in Blazor

Blazor does include routing and leans on ASP.NET's existing routing engine. If you want to make a component "routable" you can add a directive:

@page "/GreetMe"

<h1>
    Welcome!
</h1>

Now any request to http://<your-web-site-here>/GreetMe will render this component.

You can also pass data in via the route, like this:

@page "/GreetMe/{Name}"

<h1>
    Welcome @Name!
</h1>

@code {
    [Parameter]
    public string Name { get; set; }
}

Now any request to http://<your-web-site-here>/GreetMe/Jon will render a more personalized greeting (well, if your name's Jon according to this example!)

Fetching Data from an API Using React

React leaves data fetching to your discretion.

You can use the native fetch API:

let response = await fetch(url);
if(response.ok){
    let json = await response.json;
}

Or you can employ one of many third-party libraries, such as "Axios" which offers more features and flexibility.

Typically you'd fetch data using something like React's useEffect hook, then update your component state with the results.

useEffect(()=> {    
    async loadData(){
        let response = await fetch('api/Tickets');
        setTickets(await response.json);
    }
    loadData();    
}, []);

UseEffect hooks are intended to allow your component to handle "side effects", in this case, fetching data.

From here you'd typically use JavaScript's map function to loop over your data and render something for each item.

{tickets.map(ticket=> <div>
    {ticket.Title}
</div>}

Fetching Data from an API Using Blazor

With Blazor, you can use HttpClient for all your data-fetching needs!

Under the hood, this defers to the native fetch API, but you can generally just ignore that and use the abstraction.

Here's an example:

@using System.Net.Http
@inject HttpClient Http

@foreach(var ticket in _tickets){
    <div>
        @ticket.Title
    </div>  
}

@code {
    private Tickets[] _tickets;

    protected override async Task OnInitializedAsync(){
        _tickets = await Http.GetFromJsonAsync<TicketSummary>("api/Tickets");
    }
}

Shared Models—Blazor's Super Power?

Blazor has a useful trick up its sleeve (compared to React, or any other existing frontend framework) when it comes to the interaction between your UI and API.

Because you're writing your web app in C#, you can use the same data models in your frontend and backend (API) code.

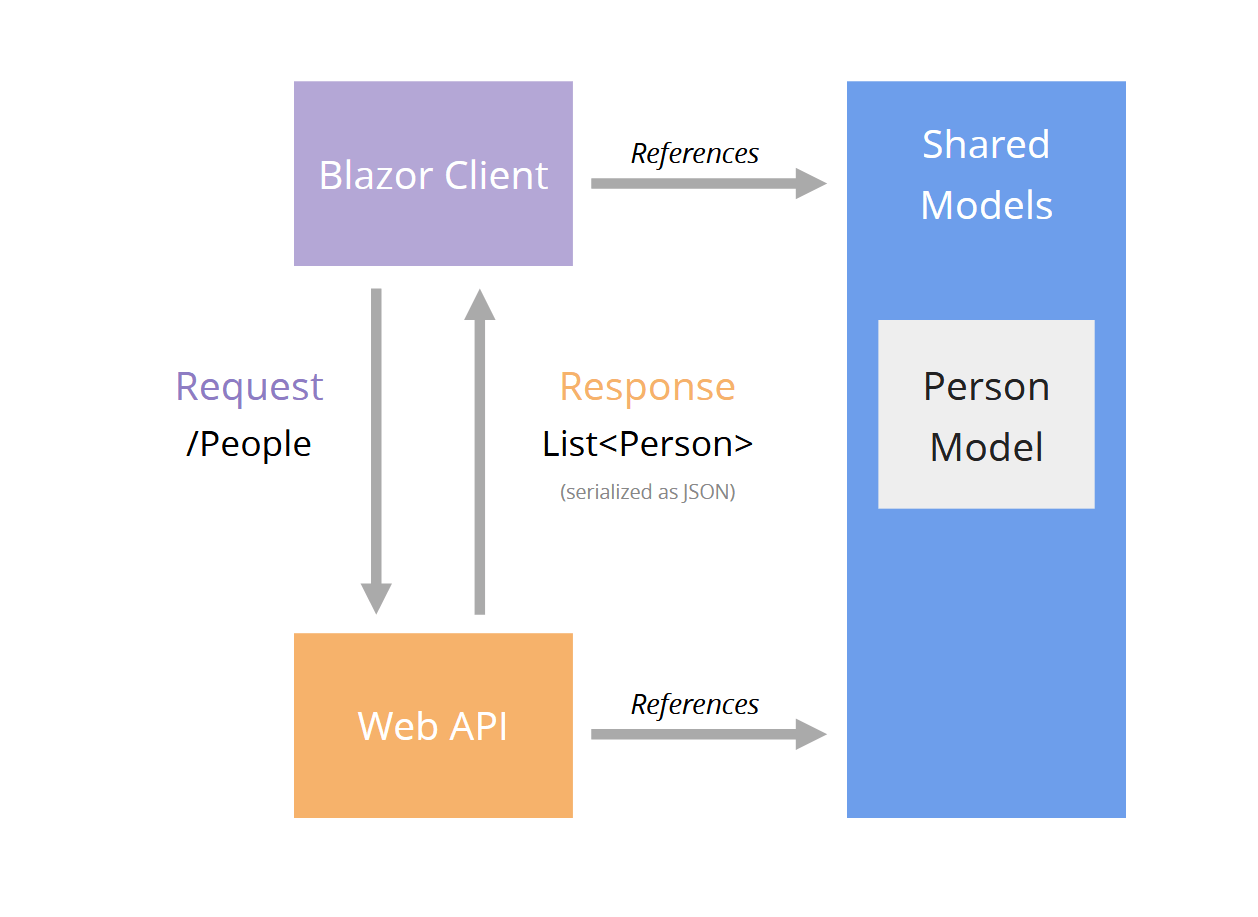
Let's say for example you need to retrieve a list of people...

Diagram showing how it works using one shared model between client and API with Blazor

The Person model lives in a shared class library.

Both your Web API and Blazor Client projects reference this shared library.

Now your API can be strongly typed, returning (and accepting) data using the Person model.

The data is still serialized and sent "over the wire" as JSON data, but your Blazor application can deserialize the JSON data using the exact same Person model that was used to serialize it in the first place.

Now if you make breaking changes to your Person model, you'll immediately see compilation errors if you've introduced any breaking changes which affect either the client or server use of the model.

Pros and Cons

So all this brings us to the obvious question: which one should you choose?

Well, naturally, this will depend on your own background, skills and preferences.

We've seen how there are a number of similarities between the two, but also a few key differences.

React

React is generally unopinionated when it comes to the things that aren't its primary focus, like routing, form handling, etc.

This could count as either a pro or a con depending on your perspective.

Also, if you're writing React components, you have little choice but to use JavaScript, and adopt everything that comes along for the ride (the ecosystem, npm, bundling, etc.).

Create React App offers a handy abstraction for some of the thornier details (like webpack), so you can focus on building your application.

React Pros

  • Well-established and battle-tested component model
  • "Create React App" simplifies the JS build process
  • "Light Touch" library—no "extras" like routers included (freedom to choose your own path!)
  • JSX—keeps the parts of the UI that change together in one place
  • Freedom to plug in other JS libraries
  • A large existing JS library ecosystem to lean on
  • Can be deployed as static files to hosting like Netlify, GitHub Pages, etc.

React Cons

  • JSX (if you don't like it!)
  • No built-in router, form handling, etc. (can slow things down as you have to plug the gaps with packages or your own solutions)
  • JavaScript (again, if you don't like it)
    • You have to use it
    • You have to learn it (difficult and time-consuming if you spend most of your time using another language like C#)
  • The JS "ecosystem" can get complicated (build tools, package managers, compilation for different browsers, etc.)

Blazor

Blazor offers a few advantages, especially if you're coming from a C# background.

You can bring your existing C# skills, experience and knowledge to the modern web application party!

You can stick to the ecosystem you already know (NuGet, the dotnet tooling, Visual Studio or VS Code).

Shared models between client and backend API. This is a big deal and makes it much harder to inadvertently break your application.

Routing, form handling and validation are baked in.

You can still call out to JavaScript if you need to.

Blazor Pros

  • Write modern web apps using C#
  • Built-in form handling, validation, routing and data-fetching client
  • Ability to bring in third-party code via NuGet packages
  • You can use the tools you already know (Visual Studio, VS Code, Rider, etc.)
  • Can be deployed as static files
  • Shared models significantly reduce the chances of accidentally breaking the client
  • You can use the same component model in the browser (using WebAssembly) or on the server (using Blazor Server)
  • Support to use the same Blazor component model on windows and for mobile development is coming

Blazor Cons

  • New framework, will take time to bed in and gain adoption
  • Sizeable initial download of .NET framework to browser on first load
  • Tooling also young and will evolve over time
  • Fewer resources available on the internet (tutorials, etc.) compared to React
  • Does depend on WebAssembly support in the browser (although this is now widely supported)
  • The initial download for the .NET runtime is relatively big

One thing to call out here is the initial download time.

When someone accesses your Blazor Wasm app for the first time, their browser will download a version of the .NET framework as well as your application's files.

Once they have these files they don't need to download them again, but it does mean you're likely to see a "loading..." indicator first time round.

The team at Microsoft has done a lot of work to get this initial download size down, but naturally this means Blazor is better suited to some web applications than others.

You probably wouldn't want to use it for things like product landing pages where there's little to no business logic and it's imperative that the page loads as quickly as possible.

But, for any Line of Business apps this initial download is unlikely to pose a major issue.

Over to You!

So, are you thinking of using Blazor? Is it a contender or your next project, or will you be sticking with React for now?

The choice is yours!

Getting Value from appsettings.json in .NET Core

$
0
0

Learn how to fetch properties or values from appsettings.json in .NET Core. We’ll cover it using both IConfiguration and Options Pattern.

Introduction

In this article, we are going to learn how to fetch properties or values from appsettings.json in .NET Core. We'll cover the following topics:

  • Getting values from appsettings.json
    • Using IConfiguration
    • Using Options Pattern
  • Conclusion

Getting Values from appsettings.json

There are one or more ways available to fetch values from appsettings.json file in .NET Core. Following are the two ways we are going to learn:

  • Using IConfiguration
  • Using Options Pattern

Using IConfiguration

The IConfiguration is available in the dependency injection (DI) container, so you can directly access JSON properties by simply injecting IConfiguration in the constructor of a controller or class. It represents a set of key/value application configuration properties.

IConfiguration is used as follows:

  • Create a simple web or web API project in .NET Core
  • Create a controller or use default one
  • Define one readonly property of type IConfiguration and inject in your controller and access JSON properties as follows:
namespace FetchAppsettingsValue.Controllers
{
    using Microsoft.AspNetCore.Mvc;
    using Microsoft.Extensions.Configuration;
    using System.Collections.Generic;

    [Route("api/Configuration")]
    [ApiController]
    public class ConfigurationController : ControllerBase
    {
        private readonly IConfiguration _config;

        public ConfigurationController(IConfiguration config)
        {
            _config = config;
        }

        // GET: api/Configuration
        [HttpGet]
        public IEnumerable<string> Get()
        {
            var result = _config.GetValue<string>("Logging:LogLevel:Default"); // "Information"
            return new string[] { result.ToString() };
        }
    }
}

Using Options Pattern

The first option we discussed is easy to use, but if you want to access multiple values then you need to provide the keys and it shows hard coded values in controllers or classes everywhere. To access multiple values or hierarchy/structured data from appsettings.json, Options Pattern is a good option. It uses classes to represent the group of hierarchy/structured settings.

Options Pattern is used as follows:

  • Create a simple web or web API project in .NET Core
  • Create a controller or use default one
  • Create a class to represent the hierarchy/structured settings (replica of appsettings.json file):
//appsettings.json
{
"Logging": {
"LogLevel": {
  "Default": "Information",
  "Warning": "Warning",
  "Error": "Error"
}
},
"AllowedHosts": "*"
}
//AppSettings.cs
namespace FetchAppsettingsValue
{
    public class AppSettings
    {
        public Logging Logging { get; set; }
        public string AllowedHosts { get; set; }
    }

    public class Logging
    {
        public LogLevel LogLevel { get; set; }
    }

    public class LogLevel
    {
        public string Default { get; set; }

        public string Warning { get; set; }

        public string Error { get; set; }
    }
}
  • Register in the configuration instance in startup.cs class of ConfigureServices method as follows:
public void ConfigureServices(IServiceCollection services)
{
    services.Configure<Logging>(Configuration.GetSection("Logging"));

    services.AddControllers();
}
  • Define one readonly property of type IOptions and inject in your controller and access JSON properties as follows:
namespace FetchAppsettingsValue.Controllers
{
using Microsoft.AspNetCore.Mvc;
using Microsoft.Extensions.Options;
using System.Collections.Generic;

[Route("api/Option")]
[ApiController]
public class OptionController : ControllerBase
{
    private readonly IOptions<Logging> _logging;
public OptionController(IOptions&lt;Logging&gt; logging)
{
    _logging = logging;
}

// GET: api/Option
[HttpGet]
public IEnumerable&lt;string&gt; Get()
{
    var result = _logging.Value.LogLevel.Default; // "Information"

    return new string[] { result };
}
} }

You can also download this example from here.

Conclusion

In this article, we discussed how to access settings from appsettings.json in .NET Core using simple examples. If you have any suggestions or queries regarding this article, please contact me.

“Learn It, Share it.”

New RadRichTextBox Structured Document Tags a.k.a. Content Controls

$
0
0

With the latest improvements in our RichTextBox for WPF, you can add specific semantics such as restricting input, modifying editing behavior, etc. to a document. Check out how it works.

With the R2 2020 release, Telerik UI for WPF gained Content Controls for RichTextBox that enable end-users to easily add specific semantics such as restricting input, modifying editing behavior, etc. to parts of a given document. In this blog post, we will walk you through the features and functionalities of the Content Controls.

Structured Document Tags vs. Content Controls

First, let us clarify an important distinction between structured document tags and content controls. Structured document tags are XML elements (tags) defined in the WordprocessingML that allow embedding customer-defined semantics as well as their behavior and appearance into a document. The visual representation (UI) of these elements we refer to as Content Controls. The Structured document tags have content and pre-defined properties, and these properties set the semantic specifics, and according to them the RadRichTextBox decides which Content Control to visualize.

For better understanding: Consider a region which should be tagged with the semantic of "birthday," for the user to enter their date of birth into the document. Ideally, this region would also utilize a date picker to allow the user to enter the date from a calendar:

Picture01 

This content would be specified by using Structured Document Tags properties and visualized (according to these properties) as Content Controls in the document.

What are the Content Controls?

Content controls are individual controls that can be used inside forms, templates and documents in order to further improve the user experience. They enable users to restrict input, modify editing behavior, etc. Content controls can be defined on Block, Inline, Row or Cell level, and can be nested inside each other. You can manipulate existing or insert new content controls.

When & Why We Need Content Controls

Content controls provide a way to design documents and templates by:

  • Controlling the input from the UI.
    For example, if you need the user to choose from a list of choices in a document section, you can add a Drop-Down List content control to the document with the predefined options.
    Picture02.png
  • Preventing users from editing protected areas.
    The content controls provide the option to restrict the area inside the content control by using its locking properties, which you can see later in the Fine Mechanics section. If the area is not inside the content control or you want to restrict an area accommodating content controls and other types of content, you can put the whole area in a Group content control or in a Rich Text content control and set its locking properties.

Working with Content Controls

When you have the RadRichTextBox control open, you can choose among the supported content control types inside the Developer Tab.

Picture03.png

Supported Content Controls Types

As of R2 2020 there are eight content control types that can be inserted using the user interface (UI) or the RadRichTextBox API:

  • Rich Text content control: This content control represents a block of rich text, where you can contain formatted text or other items (e.g. pictures, tables or even other content controls). It is the least restrictive content control and can contain more or less anything.
  • Plain Text content control: It represents a block of plain text. Its content can only consist of a single paragraph or table cell.
  • Picture content control: It can be used inside templates. It adds an image placeholder which can later be edited to contain a picture in a template.
  • Repeating Section content control: It contains at least one whole paragraph of text (Repeating Section Item) that can be repeated several times.
  • Check Box content control: The content control can be used to represent a binary choice. The default values are “checked” and “unchecked,” but it can contain any pair of symbols defined in any font installed on the current machine.
  • Combo Box content control: In a combo box, you can select an item from a list of choices, or you can provide your own custom text.
  • Drop-Down List content control: Unlike the combo box, the contents of a drop-down list should be one of the pre-defined choices.
  • Date Picker content control: It can be used in a template or form to indicate that a valid date should be entered.

RadRichTextBox supports import/export and basic operations for the following content controls as well using its API:

  • Group content control
  • Citation content control
  • Bibliography content control
  • Document Part content control
  • Document Part Gallery content control
  • Equation content control
  • Repeating Section Item content control

Fine Mechanics

Content Controls expose a bunch of properties that can be modified both directly from the UI or programmatically.

  • This example shows how to use the RadRichTextBox UI to Lock (restrict from editing and deleting) the Picture content control and how to change the Language format and DateFormat of the DatePicker content control:
    RadRichTextBox_Features_Content_controls_03
  • This example demonstrates the same functionality but programmatically:
        PictureProperties pictureProperties = new PictureProperties();
    pictureProperties.Lock = Lock.SdtContentLocked;
    this.radRichTextBox.InsertSdt(pictureProperties);

    this.radRichTextBox.InsertLineBreak();

    DateProperties dateProperties = new DateProperties();
    dateProperties.Language = new CultureInfo("bg-BG");
    dateProperties.DateFormat = "dd MMMM yyyy 'г.'";
    dateProperties.FullDate = new DateTime(2020, 5, 13);
    this.radRichTextBox.InsertSdt(dateProperties);
   

Try Content Controls Yourself

Get yourself a free trial of Telerik UI for WPF today and start developing your apps better, faster and more easily.

Check Out Telerik UI for WPF

Share Your Feedback

Let’s continue to build the future of Telerik UI for WPF together! So don’t forget to share your thoughts as a comment below or let us know if you have any suggestions and/or need any features/controls by visiting our Feedback portals about UI for WPF/Silverlight and Document Processing Libraries.


Unifying the Power of PdfViewer & PdfProcessing: Edit a PDF with our Newest Secret

$
0
0

In our latest release, we took our first steps towards giving you the ability to edit PDFs in Telerik UI for WPF. Play around with the beta and let us know what you think.

With R2 2020 we kickstarted a brand-new initiative in Telerik UI for WPF—unifying the underlying architecture of PdfViewer and PdfProcessing to allow for feature parity. This is the first step towards enabling editing functionality into the PdfViewer, and in this blog post we will walk you through the power of this unified model.

During past releases, our team worked hard to adapt the RadPdfViewer for WPF to work with the RadPdfProcessing library model. While it was a challenging task to change the model of a mature control and keep its public API, your invaluable feedback demonstrated that this would be a beneficial for your development scenarios

Are you curious about the result of our efforts? I cannot wait to show it to you! Something I must mention before starting, though, is that this change is currently in a beta state, and you will need to enable the new model explicitly. We continue polishing and testing it to ensure that the change in the model will not affect any of the existing customers before applying the change officially. And here is the place to say that your feedback will be precious for us.

Single PdfFormatProvider and Single RadFixedDocument

The unification of the models enables you to work with the same RadFixedDocument instance, no matter which of the two components you need. In the previous versions, if you needed to import a document with PdfProcessing so you can edit it and then show it in PdfViewer, you had to export the PdfProcessing document and then import it in PdfViewer. That operation was a big pain in the usage of the components but is not needed anymore with the new model! You can import the document, edit it, and just assign it to PdfViewer:

PdfFormatProvider pdfFormatProvider = new PdfFormatProvider();
RadFixedDocument document = pdfFormatProvider.Import(stream);
 
this.pdfViewer.Document = document;

Let’s now move to the more interesting part of the topic.

Enabling PDF Editing in RadPdfViewer

In this section of the post, I will walk you through the most important parts of setting up RadPdfViewer so that it allows you to add text content to an existing document in the UI. A complete project demonstrating the scenario is available in our SDK repository: Add Document Content.

To enable the user to write content over the visualized document, we will create a custom layer and will add it to the layers collection of PdfViewer. To create a layer that will be used by RadPdfViewer, you will need to implement the IUILayer interface.

public class AddTextUILayer : IUILayer

Once you have implemented it, we have to register the new layer so it can be used by the control through UILayersBuilder:

public class CustomUILayersBuilder : UILayersBuilder
{
    protected override void BuildUILayersOverride(IUILayerContainer uiLayerContainer)
    {
        base.BuildUILayersOverride(uiLayerContainer);
 
        uiLayerContainer.UILayers.AddAfter(DefaultUILayers.ContentElementsUILayer, new AddTextUILayer());
    }
}

And all that is left is to use the new builder:

CustomUILayersBuilder uILayersBuilder = new CustomUILayersBuilder();
ExtensibilityManager.RegisterLayersBuilder(uILayersBuilder);

The new layer will allow us to show a text box on the location where the user clicked and obtain the value they inserted. The most important part of the layer implementation is the SubmitChangesAndRemoveTextBox() method, which is invoked when the text box has been lost its focus. It shows how to update the document using the API of PdfProcessing. Once you have updated it internally, don’t forget to invalidate the UI so that your changes can be respected and visualized to the user. To enable that, we have exposed the PdfViewer.InvalidatePageUI() method.

private void SubmitChangesAndRemoveTextBox(object sender)
{
    TextBox textBox = (TextBox)sender;
 
    textBox.LostFocus -= this.TextBox_LostFocus;
    textBox.KeyDown -= this.TextBox_KeyDown;
 
    this.canvas.Children.Remove(textBox);
 
    string text = textBox.Text;
 
    RadFixedPage page = this.context.Page;
 
    FixedContentEditor editor = new FixedContentEditor(page);
    editor.Position.Translate(this.mouseLocation.X, this.mouseLocation.Y);
    editor.DrawText(text);
 
    RadPdfViewer viewer = this.context.Presenter.Owner as RadPdfViewer;
    if (viewer != null)
    {
        viewer.InvalidatePageUI(page);
    }
 
    this.hasActiveTextBox = false;
}

Here is what the functionality looks like:

PDFViewer

More is Coming. Do You Want to Try?

As I mentioned at the beginning of the post, the functionality is currently in beta version and is not enabled by default as we are still working on polishing it before officially presenting it to all our users. We have provided options to try the new model as we plan to migrate PdfViewer to use it and your feedback always helps us a lot.

Now you can test the new engine and let us know if you find something that you would like to see implemented differently or fixed. We encourage you to test the new behavior of the control and share your feedback with us so we can take any different points of view and scenarios you might have into account before the official change.

Let’s See How to Do That

The easiest option to setup PdfViewer to use the new model is through its default import settings. We have introduced a new property called UsePdfProcessingModel so you can switch between the two models used by the control. Here is how you can set it:

this.pdfViewer.DefaultFormatProviderSettings.UsePdfProcessingModel = true; 

In case you use the PdfFormatProvider class to import the documents into the control, you can use the same setting applied to the format provider:

FormatProviderSettings settings = new FormatProviderSettings(ReadingMode.OnDemand);
settings.UsePdfProcessingModel = true;
PdfFormatProvider provider = new PdfFormatProvider(stream, settings);
RadFixedDocument doc = provider.Import(stream);
this.pdfViewer.Document = doc;

Already using PdfProcessing? No problem! Just assign the imported RadFixedDocument instance to the Document property of RadPdfViewer:

using(var stream=File.OpenRead(filePath))
{
       PdfFormatProvider provider = new PdfFormatProvider();
       provider.ImportSettings = PdfImportSettings.ReadOnDemand;
       RadFixedDocument doc = provider.Import(stream);
       this.pdfViewer.Document = doc;
}

Note

In this release, we are announcing the immediate availability of this new model architecture for RadPdfViewer. It is still in Preview and optional for the time being as we are still working on adding more features and stability. At this point, we are improving the performance of the model and adding caching mechanisms. Once we reach full feature parity, we will then switch to the new model entirely. That is why all the team will be happy if you test the new architecture and share your feedback with us. This will help us ensure that we have covered all customer scenarios and the new model is stable as much as possible.

Try it Out Yourself and Share Your Feedback

Make sure to get the latest version and try out the new model of the RadPdfViewer control for WPF. Don't be shy and share your feedback! We are more than excited to hear what you think, so if you have any comments or suggestions, we are always here to answer all your questions :). You can use the Telerik UI for WPF Feedback Portal and as always, our ticketing system.

If you haven’t installed the components, hurry up and download a trial today: Try UI for WPF 

We can’t wait to hear your feedback regarding the new engine of RadPdfViewer!

Telerik UI for ASP.NET MVC Latest Release Brings Wizard and Pager Components!

$
0
0

Its June and time for another strong Telerik UI for ASP.NET MVC release that includes two new components—Wizard and Pager—plus a new Visual Studio Dashboard project template, and many new enhancements. Read on to see what’s new in the latest release of Telerik UI for ASP.NET MVC!

New UI for ASP.NET MVC Components

New UI for ASP.NET MVC Wizard Component

Wizard Component Overview

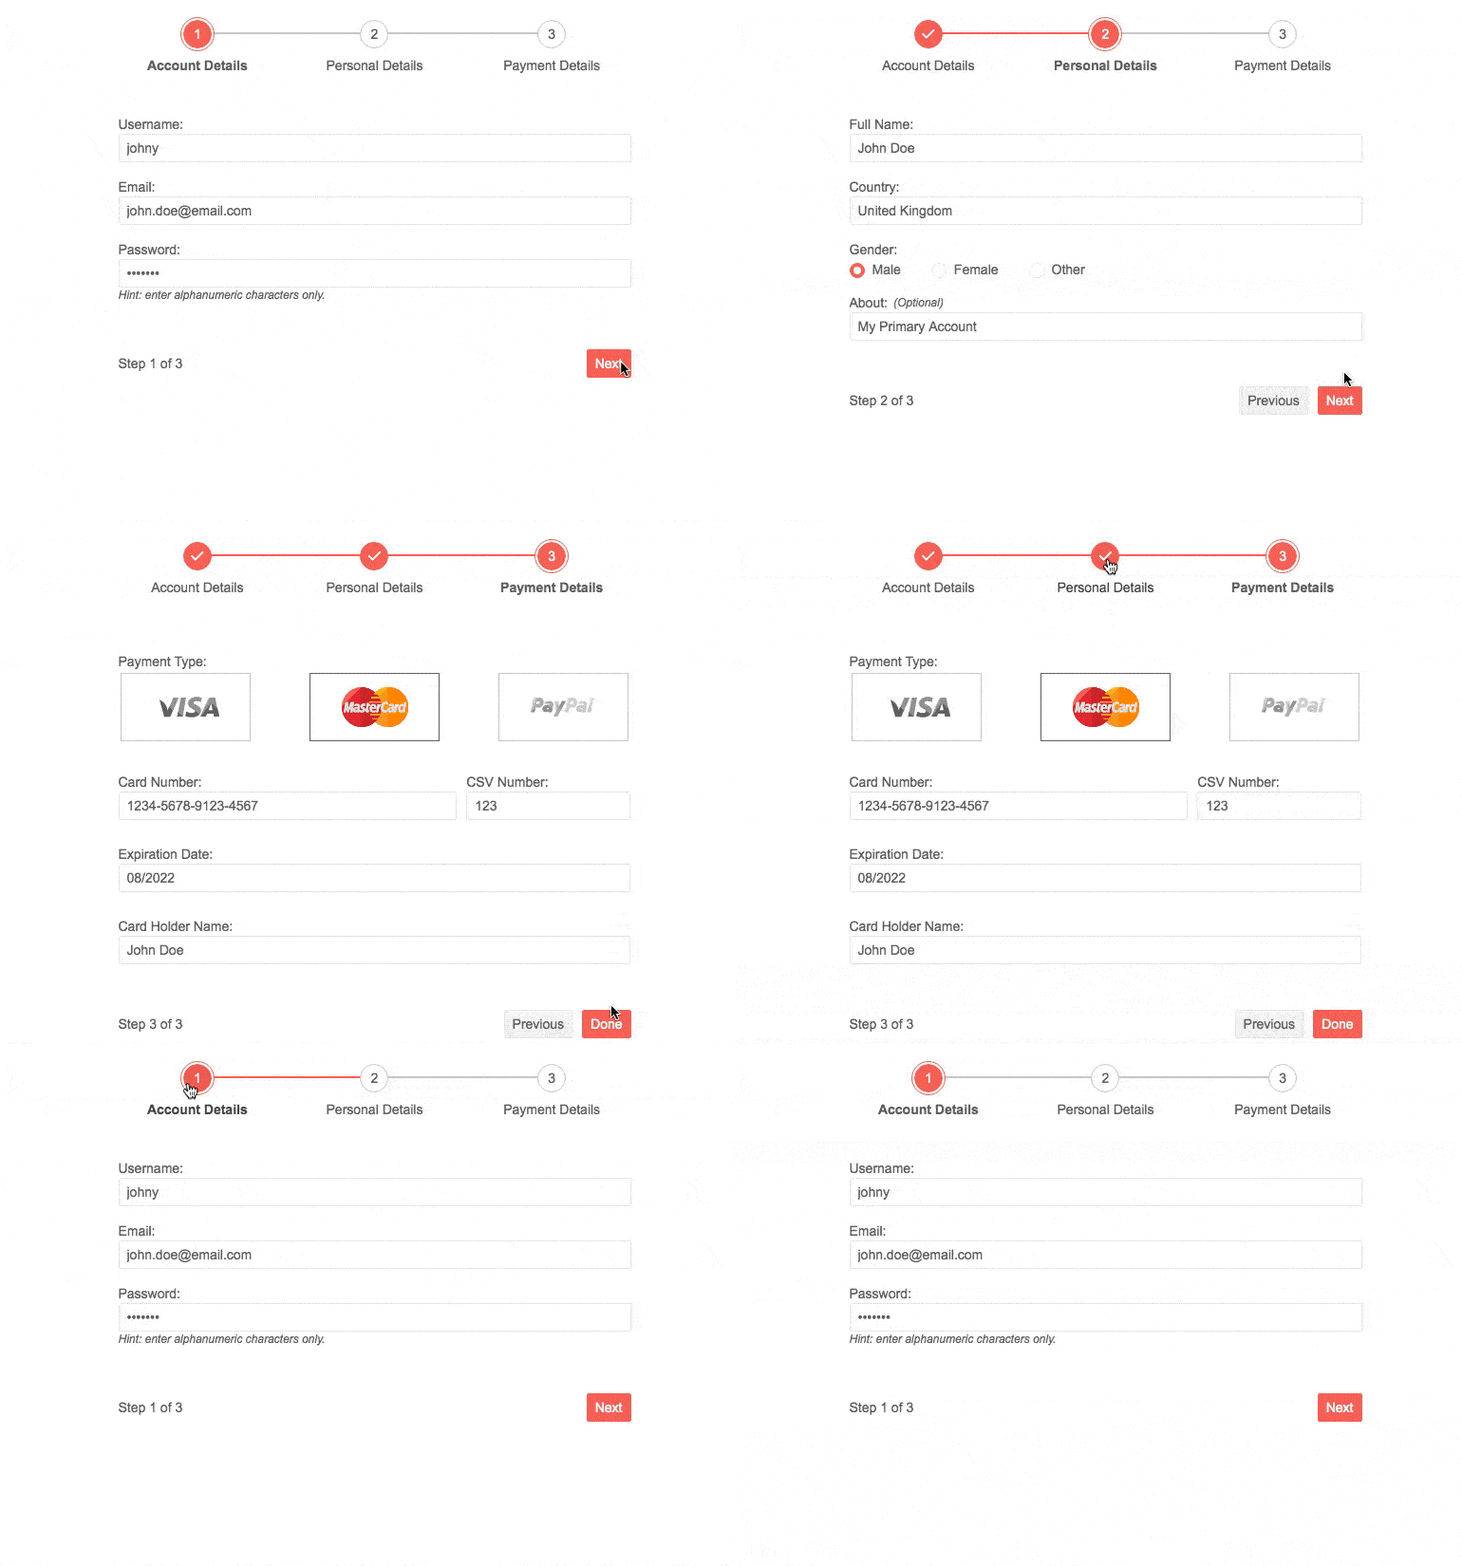
The new Telerik UI for ASP.NET MVC Wizard lets you easily create multi-step processes and simplify user input tasks in journeys. Each Wizard step can have its own content (form or other HTML), built-in form validation (via Form component integration) for the input data and a progress indicator showing the number of steps included in the process. 

Telerik UI for ASP.NET MVC Wizard Overview

Telerik UI for ASP.NET MVC Wizard Component

Wizard Component Initialization

To add the Wizard in your ASP.NET MVC applications, simply give it a name and add the needed number of steps and content, as shown in the code sample below:

@(Html.Kendo().Wizard()
     .Name("wizard")
     .Steps(s=> {
         s.Add().Content("Initial Step");
         s.Add().Content("Second Step");
         s.Add().Content("Final Step");
     })
)

Wizard Component Form Integration

Each step of the Wizard can accept a .Form() configuration method which defines all options that are available in the Form control itself. This gives you the benefit of having all the functionality available in the standalone Form component within the Wizard.


Telerik UI for ASP.NET MVC Wizard and Form Integration

                                                    Telerik UI for ASP.NET MVC Wizard and Form Integration

A partial example on how to integrate Form component can be found in the code section below (for more details, check out the Wizard Form demo).

@(Html.Kendo().Wizard()
        .Name("wizard")
        .Events(ev => ev.Done("onDone"))
        .Tag("form")
        .Steps(s =>
        {
            s.Add()
            .Title("Registration")
            .Form(f => f
                .Validatable(v =>
                {
                    v.ValidateOnBlur(true);
                    v.ValidationSummary(vs => vs.Enable(false));
                })
                .FormData(new{ Username = "johny", Email = "john.doe@email.com", Password = "pass123", DateOfBirth = String.Format("{0:ddd, dd MMM yyyy}", DateTime.Now)})
                .Items(items =>
                {
                    items.Add().Field("Username").Label(label => label.Text("Username:"));
                    items.Add().Field("Email").Label(label => label.Text("Email:"));
                    items.Add().Field("Password").Label(label => label.Text("Password:")).InputHtmlAttributes(new{ @type = "password"}).Hint("Hint: enter alphanumeric characters only.");
                    items.Add().Field("DateOfBirth").Label(label => label.Text("DateOfBirth:").Optional(true));
                })
            )
 
)

In order to facilitate the scenarios where Forms are integrated within the Wizard, the Telerik UI for ASP.NET MVC Wizard can be initialized either from a <form> or a <div> element. The configuration is set via the .Tag() configuration option.

@(Html.Kendo().Wizard()
        .Name("wizard")
        .Tag("form")
        .ValidateForms(true)
        .Steps(s=> {…}
)

Wizard Component Loading Content

You can load content in the Wizard steps in multiple ways:

  1. Using the built-in support for asynchronously loading content from remote URLs via the ContentUrl configuration option (loading data with AJAX)
  2.  Loading local content via the built-in Form configuration
  3. Loading local HTML content

Wizard Component Layout Options

Using the ContentPosition option, the Wizard layout can be configured in one of the following three rendering modes: a Stepper in a horizontal orientation above the content of the Wizard, vertical left or  vertical right side of the Wizard step content.

@(Html.Kendo().Wizard()
        .Name("wizard")
        .ContentPosition(WizardContentPosition.Right)
        .Steps(s=> {…}
)

Telerik UI for ASP.NET MVC Stepper Right Orientation
Telerik UI for ASP.NET MVC Wizard—Right Vertical Position of Stepper

Wizard Component Accessibility and Keyboard Navigation

The Wizard has built-in Keyboard Navigation that will allow easy navigation and interaction with the steps and inputs of the component using keyboard. It also comes with out-of-the box support for accessibility standards such as WCAG, Section 508 and WAI-ARIA attributes, that let users with disabilities use the Telerik Wizard with ease.

New UI for ASP.NET MVC Pager Component

Pager Component Overview

The Telerik UI for ASP.NET MVC Pager is a responsive standalone UI component which enables splitting content into pages. The Pager component allows integration with other data-bound UI components that do not have built-in paging such as the ListView, and you can use it for paging your data in templates too!

Telerik UI for ASP.NET MVC Pager Component -Themes

Telerik UI for ASP.NET MVC Pager Component

Using the Pager Component

To add the Pager component to your MVC applications you need to define a standalone data source and pass it by name to the Pager and to the data-bound control that will use it, as shown in the example below:

@(Html.Kendo().DataSource<Kendo.Mvc.Examples.Models.OrderViewModel>()
     .Name("dataSource1")
     .Ajax(t=>t.Read(read => read.Action("People_Read", "Pager")).PageSize(20))
)
 
@(Html.Kendo().Pager()
     .Name("pager")
     .DataSource("dataSource1")
     .PageSizes(true)
)

Pager Settings and Configuration Options

The Pager component can be configured to show specific number of buttons that will be shown in a numeric page, or accept user input via its type setting:

.Numeric(true//default
.Input(true)

Additionally, you have control over which built-in Pager elements are to be rendered:

  • PageSizes() - renders the dropdown that allows the user to change the page size
  • Refresh() - renders a refresh button
  • PreviousNext() - toggles the visibility of buttons for navigating to the first, last, previous and next pages
  • Info() - toggles the visibility of the current pager information

Pager Component Built-In Localization

The UI for ASP.NET MVC Pager component has built-in localization support, which makes it easy to translate messages such as: the text of the tooltips for its page and navigation links, information text and labels to any language that your app may require.

New Visual Studio Dashboard Template Project

For those of you building a dashboard-like application, the new Visual Studio Dashboard Project Template will come in handy with its predefined layout and UI building blocks.

Once you update your Telerik UI for ASP.NET MVC version with the latest package, you can create a new project and choose the new Dashboard template from the Create New Telerik Project Wizard.

Telerik UI for ASP.NET MVC VS Project Dashboard Template

Telerik UI for ASP.NET MVC Dashboard Project Template

What’s Coming Next in Telerik UI for ASP.NET MVC in R3 2020

Check out the Telerik UI for ASP.NET MVC roadmap page and see what we are already cooking for the R3 2020 release due in September. Not only will you get an insider’s look at our components and features pipeline for Telerik UI for ASP.NET MVC, but you’ll continue to have the opportunity to help us improve the suite with your valuable feedback.

Download the Latest from Telerik UI for ASP.NET MVC

We would like to thank for the continuous support and encourage you to download a free trial version of Telerik UI for ASP.NET MVC, or if you are an active license holder you can just grab the latest and greatest from the Your Account page!

Happy ASP.NET MVC Coding!

New Release of Telerik UI for ASP.NET Core brings Wizard and Pager Components!

$
0
0

Just a month after the R2 2020 release of Telerik UI for ASP.NET Core we are happy to share another update that includes two new components—Wizard and Pager— as well as a new Visual Studio Dashboard project template, compatibility with .NET 5 preview 5 and many new enhancements. Read on and see the highlights in the latest release of Telerik UI for ASP.NET Core!

Compatibility with .NET 5.0 Preview Versions

We continue with our efforts to stay current with all updates by Microsoft in the preview versions of .NET 5.0 until its official release later this year in November. We are happy to share that Telerik UI for ASP.NET Core latest release is compatible with .NET 5.0 preview 5.

New UI for ASP.NET Core Components

New UI for ASP.NET Core Wizard Component

Wizard Component Overview

The new Telerik UI for ASP.NET Core Wizard lets you easily break up long processes into multiple steps and simplify user input tasks by exposing to them just one form at a time. Each Wizard step can have its own content (form or other HTML), comes with built-in form validation (via Form component integration) for the input data and a progress indicator showing the number of steps left towards achieving their final goal for the process. 

 Telerik UI for ASP.NET Core Wizard Component

Telerik UI for ASP.NET Core Wizard Component

Wizard Component Initialization HTML and TAG Helpers

To add the Wizard in your ASP.NET Core applications, simply initialize it by giving it a name and adding the needed number of steps and content, as shown in the code sample below:

@(Html.Kendo().Wizard()
        .Name("wizard")
        .Steps(s=> {
            s.Add().Content("Initial Step");
            s.Add().Content("Second Step");
            s.Add().Content("Final Step");
        })
)

For those of you who prefer using TAG helpers over HTML helpers, you can directly plug the <kendo-wizard> and<wizard-steps> tags to configure your Wizard component.

Wizard Component Form Integration

The Telerik UI for ASP.NET Core Wizard provides simple, yet powerful integration with the Telerik UI for ASP.NET Core Form component.

Each step of the Wizard can accept a .Form() configuration method which defines many out-of-the box options (as they are available in the Form control itself). This gives you the benefit of having all the functionality available in the stand-alone Form component within the Wizard.

Telerik UI for ASP.NET Core Wizard Validation
Telerik UI for ASP.NET Core Wizard Component integration with Form Component

A partial example on how to integrate Form component can be found in the code section below (for more details, check out the Wizard Form demo).

@(Html.Kendo().Wizard()
        .Name("wizard")
        .Events(ev => ev.Done("onDone"))
        .Tag("form")
        .Steps(s =>
        {
            s.Add()
            .Title("Registration")
            .Form(f => f
                .Validatable(v =>
                {
                    v.ValidateOnBlur(true);
                    v.ValidationSummary(vs => vs.Enable(false));
                })
 
                .FormData(new{ Username = "johny", Email = "john.doe@email.com", Password = "pass123", DateOfBirth = String.Format("{0:ddd, dd MMM yyyy}", DateTime.Now)})
                .Items(items =>
                {
                    items.Add().Field("Username").Label(label => label.Text("Username:"));
                    items.Add().Field("Email").Label(label => label.Text("Email:"));
                    items.Add().Field("Password").Label(label => label.Text("Password:")).InputHtmlAttributes(new{ @type = "password"}).Hint("Hint: enter alphanumeric characters only.");
                    items.Add().Field("DateOfBirth").Label(label => label.Text("DateOfBirth:").Optional(true));
                })
            )
 
 
)

In order to facilitate the scenarios where Forms are integrated within the Wizard, the Telerik UI for ASP.NET Core Wizard can be initialized either from a <form> element or a <div> element. The configuration is set via the .Tag() configuration option.

@(Html.Kendo().Wizard()
        .Name("wizard")
        .Tag("form")
        .ValidateForms(true)
        .Steps(s=> {…}
)

Wizard Component Loading Content

The Wizard lets you load step content in multiple ways:

  1. Using the built-in support for asynchronously loading content from remote URLs via the ContentUrl configuration option (loading data with AJAX)
  2. Loading Local Content via the Built-in Form Configuration
  3. Loading Local HTML Content

Wizard Component Layout

You can configure the rendering of the Wizard layout using the ContentPosition option to one of the three: a Stepper in a horizontal orientation above the content of the Wizard, vertical left or vertical right side of the Wizard step content.

@(Html.Kendo().Wizard()
        .Name("wizard")
        .ContentPosition(WizardContentPosition.Right)
        .Steps(s=> {…}
)

Telerik UI for ASP.NET Core Stepper Left Orientation

Telerik UI for ASP.NET Core Wizard – Left Vertical Position of Stepper

Wizard Component Accessibility and Keyboard Navigation

The Wizard has built-in Keyboard Navigation that will allow easy navigation and interaction with the steps and inputs of the component using keyboard. It also comes with out-of-the box support for accessibility standards such as WCAG, Section 508 and WAI-ARIA attributes, that let users with disabilities use the Telerik Wizard with ease.

New UI for ASP.NET Core Pager Component

Pager Component Overview

The Telerik UI for ASP.NET Core Pager is a responsive standalone UI component which enables the splitting of content and its visualization into pages. The Pager component allows integration with other data-bound UI components that do not have built-in paging such as the ListView, and you can use it for paging your data in templates too!

Telerik UI for ASP.NET Core Pager Component

Telerik UI for ASP.NET Core Pager

Pager HTML Helper or TAG Helper

To add the Pager to your applications using an HTML helper you need to define a standalone data source and pass it by name to the Pager and to the data-bound control that will use it, as shown in the example below:

@(Html.Kendo().DataSource<Kendo.Mvc.Examples.Models.OrderViewModel>()
     .Name("dataSource1")
     .Ajax(t=>t.Read(read => read.Action("People_Read", "Pager")).PageSize(20))
)
 
@(Html.Kendo().Pager()
     .Name("pager")
     .DataSource("dataSource1")
     .PageSizes(true)
)

Alternatively, you can use the handy TAG helper option:

<kendo-datasourcename="dataSource1"type="DataSourceTagHelperType.Ajax"server-operation="false">
    <transport>
        <readurl="@Url.Action("TagHelper_Products_Read", "DataSource")" />
    </transport>
</kendo-datasource>
 
 
<kendo-pagername="pager1"refresh="true"datasource-id="dataSource1"page-sizes="true">
</kendo-pager>

Pager Configuration and Settings

The Pager component can be configured to show a specific number of buttons that will be shown in a numeric page, or accept user input via its type setting:

.Numeric(true) //default
.Input(true)

Additionally, you have control over which built-in Pager elements will be rendered:

  • PageSizes() - renders the dropdown that allows the user to change the page size
  • Refresh() - renders a refresh button
  • PreviousNext() - toggles the visibility of buttons for navigating to the first, last, previous and next pages
  • Info() - toggles the visibility of the current pager information

Pager Built-In Localization

The UI for ASP.NET Core Pager component has built-in localization support, which makes it easy to translate messages such as: the text of the tooltips for its page and navigation links, information text and labels to any language that your app may require.

Telerik UI for ASP.NET Core Pager Localization

Telerik UI for ASP.NET Core Pager Localization

New Visual Studio Dashboard Template Project

For those of you building dashboard-like application the new Visual Studio Dashboard Project Template will come handy with its predefined layout and UI building blocks.

Once you update your Telerik UI for ASP.NET Core version with the latest package, you can create a new project and choose the new Dashboard template from the Create New Telerik Project Wizard.

Telerik UI for ASP.NET Core Create Project Wizard

Telerik UI for ASP.NET Core VS Project Dashboard Template
Telerik UI for ASP.NET Core Dashboard Project Template

What’s Coming Next in Telerik UI for ASP.NET Core?

Check out the Telerik UI for ASP.NET Core roadmap page and see what we are already cooking for the R3 2020 release due in September. Not only will you get an insider’s look at our components and features pipeline for Telerik UI for ASP.NET Core, but you’ll continue to have the opportunity to help us improve the suite with your valuable feedback.

Download the Latest from Telerik UI for ASP.NET Core

We would like to thank for the continuous support and encourage you to download a free trial version of Telerik UI for ASP.NET Core, or if you are an active license holder you can just grab the latest and greatest from the Your Account page! Share your thoughts with us on our feedback portal and help us shape the future of UI for ASP.NET Core.

Happy ASP.NET Core Coding!

What’s New in Telerik UI for Xamarin DataGrid Control?

$
0
0

With R2 2020 release of Telerik UI for Xamarin we have implemented three powerful new features for the RadDataGrid that allow you to customize the content template and edit template of cells. These options are available for all columns provided by the DataGrid control.

We love to listen to your feedback and the filtering capabilities of the DataGrid TemplateColumn was one of the most requested features by you, so we pulled it off just in time for our new major release! The feature is now part of the DataGrid features set.

In this blog post I will get you familiar with the new DataGrid Columns features CellContentTemplate, CellEditTemplate and the new filtering option—FilterControlTemplate.

Customize the ContentTemplate of Cells

This feature enables users to customize the look of the content of the cell using their own DataTemplate and at the same time the RadDataGrid will be able to execute operations like grouping, sorting and filtering over that column. This is possible since the meta information that comes with the type of the column is still available for the grid component.

cellcontent datagrid column


Below is the source code used for the above GIF.

Sample business model definition:

public class City
{
    public string Name { get; set; }
    public int Population { get; set; }
    public DateTime? Visited { get; set; }
    public bool IsVisited { get; set; }
}

The ViewModel:

publicclassViewModel
{
    publicViewModel()
    {
        this.Items = newObservableCollection<City>
        {
            newCity{Name = "London", Visited = newDateTime(2019,03,15), IsVisited = true, Population = 8982000},
            newCity{Name = "New York", Visited = null, IsVisited = false, Population = 8399000},
            newCity{Name = "Tokyo", Visited = newDateTime(2019,11,12), IsVisited = true, Population = 9273000},
            newCity{Name = "Madrid", Visited = null, IsVisited = false, Population = 6642000},
            newCity{Name = "Paris", Visited = null, IsVisited = false, Population = 2148000},
            newCity{Name = "Berlin", Visited = newDateTime(2017,12,27), IsVisited = true, Population = 3769000},
        };
 
    }
    publicObservableCollection<City> Items { get; set; }
}

Next, we have the DataGrid XAML Definition with CellContentTemplate property set to TextColumn, BooleanColumn and DateColumn. The CellContentTemplate of the DateColum uses RadDatePicker for Xamarin control. 

<telerikDataGrid:RadDataGridx:Name="dataGrid"
                            ItemsSource="{Binding Items}"
                            AutoGenerateColumns="False"
                            UserEditMode="Cell">
    <telerikDataGrid:RadDataGrid.BindingContext>
        <local:ViewModel/>
    </telerikDataGrid:RadDataGrid.BindingContext>
    <telerikDataGrid:RadDataGrid.Columns>
        <telerikDataGrid:DataGridTextColumnPropertyName="Name"
                                            Width="100"
                                            SizeMode="Fixed"
                                            HeaderText="City">
            <telerikDataGrid:DataGridColumn.CellContentTemplate>
                <DataTemplate>
                    <LabelText="{Binding Name}"
                            VerticalOptions="Center"/>
                </DataTemplate>
            </telerikDataGrid:DataGridColumn.CellContentTemplate>
        </telerikDataGrid:DataGridTextColumn>
 
        <telerikDataGrid:DataGridBooleanColumnPropertyName="IsVisited"
                                                HeaderText="Visited?">
            <telerikDataGrid:DataGridColumn.CellContentTemplate>
                <DataTemplate>
                    <StackLayoutOrientation="Horizontal">
                        <LabelText="{Binding Source={x:Reference switch}, Path=IsToggled}"
                                VerticalOptions="Center"/>
                        <SwitchIsToggled="{Binding IsVisited}"
                                x:Name="switch"
                                VerticalOptions="Center"/>
                    </StackLayout>
                </DataTemplate>
            </telerikDataGrid:DataGridColumn.CellContentTemplate>
        </telerikDataGrid:DataGridBooleanColumn>
 
        <telerikDataGrid:DataGridDateColumnPropertyName="Visited"
                                            HeaderText="Date Visited">
            <telerikDataGrid:DataGridColumn.CellContentTemplate>
                <DataTemplate>
                    <telerikInput:RadDatePickerDate="{Binding Visited}"
                                                DisplayStringFormat="yyyy/MMM/dd"
                                                VerticalOptions="Center"/>
                </DataTemplate>
            </telerikDataGrid:DataGridColumn.CellContentTemplate>
        </telerikDataGrid:DataGridDateColumn>
    </telerikDataGrid:RadDataGrid.Columns>
</telerikDataGrid:RadDataGrid>

Customize the EditTemplate of Cells

RadDataGrid now allows you to modify the template of a cell when it goes into edit mode. This can be easily done with the CellEditTemplate property which is shared between all existing column types.

cell edit template datagrid for xamarin

Demo: Let's use the same Business Model and ViewModel as in the CellContentTemplate Example. Here is the DataGrid XAML definition used with CellEditTemplate property set:

<telerikDataGrid:RadDataGridx:Name="dataGrid"
                            ItemsSource="{Binding Items}"
                            AutoGenerateColumns="False"
                            UserEditMode="Cell">
    <telerikDataGrid:RadDataGrid.BindingContext>
        <local:ViewModel/>
    </telerikDataGrid:RadDataGrid.BindingContext>
    <telerikDataGrid:RadDataGrid.Columns>
        <telerikDataGrid:DataGridTextColumnPropertyName="Name"
                                            HeaderText="City">
            <telerikDataGrid:DataGridColumn.CellEditTemplate>
                <DataTemplate>
                    <StackLayoutOrientation="Horizontal">
                        <EntryText="{Binding Item.Name, Mode=TwoWay}"
                               Margin="5"
                               ReturnCommand="{Binding CommitEditCommand}"/>
                        <ButtonText="Cancel"Command="{Binding CancelEditCommand}"/>
                    </StackLayout>
                </DataTemplate>
            </telerikDataGrid:DataGridColumn.CellEditTemplate>
        </telerikDataGrid:DataGridTextColumn>
 
        <telerikDataGrid:DataGridBooleanColumnPropertyName="IsVisited"
                                               HeaderText="Visited?">
            <telerikDataGrid:DataGridColumn.CellEditTemplate>
                <DataTemplate>
                    <StackLayoutOrientation="Horizontal">
                        <SwitchIsToggled="{Binding Item.IsVisited, Mode=TwoWay}"/>
                        <ButtonText="Cancel"Command="{Binding CancelEditCommand}"/>
                        <ButtonText="OK"Command="{Binding CommitEditCommand}"/>
                    </StackLayout>
                </DataTemplate>
            </telerikDataGrid:DataGridColumn.CellEditTemplate>
        </telerikDataGrid:DataGridBooleanColumn>
     </telerikDataGrid:RadDataGrid.Columns>
</telerikDataGrid:RadDataGrid>

New Filtering Feature—FilterControlTemplate 

The Xamarin DataGrid extends the functionality of the TemplateColumn of the component and will now support filtering. You can define a custom template for the filtering UI as well as custom filtering logic. And not only for TemplateColumn, The FilterControlTemplate property can be applied to all DataGrid columns.

datagrid filter control

The source code of the FilterControl Template Demo can be found in our SDK Browser application/Examples/DataGridControl/FilteringCategory section.

Tell Us What You Think

We would love to hear what you think about the new DataGrid features. If you have any ideas for new features to add, do not hesitate to share this information with us on our Telerik UI for Xamarin Feedback portal.

Don’t forget to check out the various demos of the control in our SDK Sample Browser and the Telerik UI for Xamarin Demos application.

Real-World Xamarin App Examples

Discover the power of Telerik UI for Xamarin with several fully functional, real-world Xamarin.Forms application examples.

Examples source code can be checked in the Telerik Xamarin.Forms Samples GitHub repo.

Happy coding with our controls and stay with us! We would love to share more with you in an upcoming blog post about Date Picker, Time Picker, TimeSpan Pickerand Telerik Mobile Blazor Bindings for Xamarin

R2 2020 SP of Telerik UI for WPF Brings 50+ Enhancements and New Features

$
0
0

The R2 2020 Service Pack of Telerik UI for WPF and Telerik UI for Silverlight is live today! It delivers over 50 improvements and new features for Docking, DesktopAlert, RichTextBox and other controls. Let’s dive in together in what is new with R2 2020 Service Pack.

Docking: Navigator

Docking Navigator

With this Service Pack, RadDocking gains functionality that will enable quick navigation between the panes similar to the one seen in IDE navigator of Visual Studio. Using the new DockingNavigator control, the user can easily navigate over all non-hidden panes, check their contents in the preview section and automatically activate the selected pane on close.

The DockingNavigator control provides options to customize every part of it as well as exposes a couple of events to enable even more flexibility. You can easily specify how each Pane should be represented by setting the following attached properties:

  • DockingNavigator.Icon: Gets or sets an object that will represent the icon for that pane
  • DockingNavigator.Header: Gets or sets an object that will represent the header for that pane
  • DockingNavigator.Footer: Gets or sets an object that will represent the footer for that pane
  • DockingNavigator.Description: Gets or sets an object that will represent the description for that pane

And when it comes to the Icon—the navigator provides support for displaying Glyph icons out of the box and if you need to use images just use custom DataTemplates.

Let me show you how to quickly set it up—set the attached properties to a Pane:

<telerik:RadDocumentPaneHeader="Document Pane 1"
                         telerik:DockingNavigator.Icon="&#xe63b;"
                         telerik:DockingNavigator.Description="My first document pane"
                         telerik:DockingNavigator.Footer="My first document footer">
     <TextBlockTextWrapping="Wrap"Text="Press Ctrl + Tab or Alt + F7 to open the DockingNavigator."/>
</telerik:RadDocumentPane>

And set the Navigator property of RadDocking to a new instance of DockingNavigator as shown below:

<telerik:RadDockingx:Name="docking">
    <telerik:RadDocking.Navigator>
        <telerik:DockingNavigator/>
    </telerik:RadDocking.Navigator>
    ...
</telerik:RadDocking>

That’s it—see it in action in the GIF above. For more details check the Navigator article from the Docking documentation.

DesktopAlert: Play Sound

We are adding option to RadDesktopAlert allowing you to specify the sound that will be played when the alert is shown on the screen. You need to just set the Sound property to one of the built-in framework sounds (SystemSound) as shown below:

var alert = newRadDesktopAlert();
alert.Header = "Title";
alert.Sound = System.Media.SystemSounds.Beep;

Additionally, a custom sound can be played—just inherit from RadDesktopAlert and override the PlaySound method. For more details check the Sound article from our help documentation.

I cannot add a GIF that demonstrates the feature (), so make sure to check it in our WPF demo application.

Chat: Suggested Actions Orientation

Until now the suggest actions of RadChat were always displayed horizontally. With the R2 Service Pack, by using the new SuggestActionsOrientation property, is now possible to quickly change their orientation to vertical. Check out the vertically oriented suggested actions below:

RadChat Actions Orientation

For more info check out the Suggested Actions article from our documentation.

RichTextBox: Style Synchronization and Support for Importing Bullet Lists

  • RadRichTextBox Styles in the document gallery are now automatically synchronized with the selection. When you click somewhere in the document the style will be highlighted in the gallery and in the styles dialog.

    RadRichTextBox Style Sync

  • Importing HTML that contains a bullet list with specified type (circle, disc, square) is now supported in RadRichTextBox. The styles will be correctly imported, and you will be able to see the styles as in the browser:

    RadRichTextBox Import Bulleted List

SpreadProcessing: TextRotation Support

RadSpreadProcessing now supports TextRotation. You will be able to import/export the TextRotation with the XLSX format and set it in the code behind. The following example shows how you can set it: 

radSpreadsheet.ActiveWorksheet.Cells[0, 0].SetValue("Vertical Text");
radSpreadsheet.ActiveWorksheet.Cells[0, 0].SetTextRotation(90); 

Here is the result: 

RadSpreadProcessing TextRotation

For more details check the Cell Styles article from our help documentation.

.NET Core: Prepopulated VS Toolbox

As you might already know the toolbox for .NET Core works depending on the referenced NuGet packages in the application. With the latest preview (16.7.0 Preview 2) of Visual Studio 2019, Microsoft added an option to enable the population of the toolbox without having any references. We already took advantage of it, so after you install this R2 Service Pack of Telerik UI for WPF and create an empty WPF .NET Core project (using the latest preview of VS) you should be able to see full toolbox as shown below:

DotNet Core Prepopulated VS Toolbox

Happy coding!

Check Out the Detailed Release Notes

We have a lot more! To get an overview of all the latest features and improvements we’ve made, check out the release notes for the products below:

Share Your Feedback

Feel free to drop us a comment below sharing your thoughts. Or visit our Feedback portals about UI for WPFSilverlight and Document Processing Libraries and let us know if you have any suggestions or if you need any particular features/controls.

Don't wait—try out the latest:

UI for WPF UI for Silverlight

In case you missed it, here are some of the updates from our last release.

R2 2020 Service Pack for Telerik UI for WinForms: 20+ Enhancements and Fixes

$
0
0

Enjoy over 20 enhancements and fixes with Telerik UI for WinForms R2 2020 Service Pack, as well as more development on the Telerik .NET Core WinForms designer! 

In the month following our latest major release, the team behind Telerik UI for WinForms was able to address more than 20 reported items on various controls and functionalities. Special thanks to the developers who reported these issues so we can provide the fixes . Aside from the various enhancements in the UI suite, we are continuing our work on the Telerik .NET Core WinForms designer. Stay tuned to learn more about Telerik UI for WinForms R2 2020 Service Pack!

The service pack includes important updates in the RadScheduler, RadGridView and the entire Telerik Presentation Framework. The release notes are available here: https://www.telerik.com/support/whats-new/winforms/release-history.

Below are some of the more important enhancements:

RadScheduler and Entity Framework

A client recently reported that the RadScheduler could not handle quite well the exceptions of a recurring appointment when it is bound with Entity Framework. We knew that you love Entity Framework so that automatically raised the priority of the issue. Digging deep into our codebase it turned out that the entire feature was missing, and the exceptions read by Entity Framework could not be extracted by our data layer. We are very happy that we managed to implement the missing functionality for the service pack.

recurring-appointment-exception-ef

BypassSort and BypassFilter in RadGridView

RadGridView has a mechanism to skip filtering and sorting in its data layer and still indicate that a Column has been sorted or filtered in the UI. This functionality comes in handy when your end users are applying sort and filter descriptors via the built-in UI in the grid and you want to apply these descriptors straight on your data source. For example, you are bound to a data table and now you have the option to apply the sorting and filtering to the data table's default view Sort and RowFilter properties. Up until now the BypassSort and BypassFilter were not working independently. Setting the BypassSort to true would break the default filtering mechanism and this was not expected. Now the two properties are working independently and one can either skip sorting or filtering or even both if the two properties are true.

GIFs on High DPI

Screens with greater resolution are becoming standard these days. 4K displays are more and more common and we know that developing for High DPI is a challenge. Our framework supports GIF files well, and this might come useful in certain scenarios. The support we had did not include High DPI screens. This limitation is now resolved, and we are happy to announce that GIFs are also supported on High DPI.

gifs-virtual-grid

.NET Core WinForms Design Time

We've made a significant progress porting many of the existing designers to .NET Core. Still, Visual Studio lacks official support for custom controls in .NET Core, so at the moment it is not possible to test the designers for yourself. We are collaborating closely with Microsoft to find the best possible solution. Olia Gavrysh, a Program Manager at Microsoft, had a nice blog post on the WinForms designer in .NET Core. The screenshot in the What’s coming next section features the all mighty RadGridView shown in the .NET Core designer.

Try it Out

Make sure to download and try the latest version of Telerik UI for WinForms to explore all the new features and themes:

Start My Trial

We'd love to hear how this all works for you, so please let us know your thoughts by visiting our Feedback portal or by leaving a comment below.

7 Things to Enjoy in MAUI

$
0
0

.NET Multi-platform App UI (MAUI) is the next evolution of cross-platform UI solution for .NET developers. Just like the island, MAUI will have plenty to offer for developers. Let's explore the promise of .NET MAUI .

Maui—the paradise on Earth. Nicknamed the Valley Isle, Maui is the second-largest Hawaiian island and has a lot to offer. Maui boasts of some pristine, world-famous beaches and amazing ocean life under the water surface. That's not all though. Maui is host to a massive volcano, high mountains and breathtaking waterfalls. With a wide variety of weather systems and top notch culinary scene, Maui is a true gem among the Hawaiian archipelago. Maui epitomizes the Aloha spirit and offers something for everybody.

DotNetBotMaui  

There is another Maui that is plenty exciting as well—the .NET MAUI. .NET is already well positioned to allow developers to target a wide variety of app platforms and polished tooling. However, .NET is in need for some unification and the time is ripe to roll out a consistent first-class UI framework for variety of platform needs. Enter the evolution of cross-platform .NET stack—the Multi-platform App UI, affectionately called .NET MAUI. While in its early days, .NET MAUI already promises new tooling, a unified framework and more flexibility for developers. Let's explore the top seven things to enjoy in MAUI—lots of similarities between the island and the framework.

Haleakala Chopper Tours

Maui has a lot to offer. Even with high enthusiasm, there are limits to how much one can see while on land in Maui. There will be the upstream mountainside waterfalls you'll miss or the grandeur of the Haleakala Crater. To get a bigger picture of Maui, one has to fly with the birds. A lot of Maui's beauty is often best captured from air and popular helicopter tours may just make your flight worth it. Traveling inter-island is also a big part of life in Hawaii and smaller scenic plane flights provide excellent opportunities to take in the vistas.

As with the island, one cannot appreciate .NET MAUI without the bigger picture in mind. While modern .NET allows developers to target a variety of platforms, developers do see a bit of fragmentation in the framework and differences in tooling. There are several popular .NET base class libraries (BCLs)—like .NET Framework. .NET Core, Mono, Unity etc., each of which caters .NET to specific app models/platforms. While .NET MAUI tools ship with .NET 6 in Nov 2021, it would surely ride the benefits of .NET 5, expected later in 2020. .NET 5 sees a unification story for all .NETs, combing the best of .NET Core and Mono. With .NET 5, developers get a single trustworthy open source .NET with polished cross-platform tooling to build all types of apps—Windows, Linux, MacOS, iOS, Android, WebAssembly and more.

DotNet5

.NET MAUI is positioned to be the next evolution of Xamarin.Forms—with added confidence, additional platform support and better tooling. In addition to iOS/Android mobile platforms, .NET MAUI adds support for desktop platforms, namely Windows and MacOS, as well as supporting upcoming dual screen devices. In essence, .NET MAUI  promises to be the single stack UI framework for .NET developers aiming for cross-platform workloads—truly native apps from a single code base. .NET MAUI would be an integral part of the overall .NET story, alluring developers with platform reach and polished tooling.

MauiOverview

Honokalani Black Sand Beach

When you embrace differences, you often find something enriching. Sure Maui offers plenty of amazing beaches with silky smooth white sand to soak up the tropics. But step off the beaten path towards Hana and you'll find a beautiful black sand beach—mystical dark pebbles redefine what a beach can be. On the hike down to Honokalani black sand beach, you also find hidden caves, giant splashing water holes and amazing views.

Xamarin has been a wonderful solution for .NET developers going cross-platform and the Xamarin.Forms UI stack is defined in XAML. Serious developers shipping Xamarin.Forms apps have often resorted to MVVM (Model-View-ViewModel), a common design principle for code sanity. .NET MAUI will offer developers the same C#/XAML experience with support for various MVVM frameworks. Here's how developers have traditionally hooked up a button counting clicks in Xamarin.Forms—perfectly welcome in .NET MAUI.

<StackLayout>
    <Label Text="Hello World!" />
    <Button Text="{Binding Text}" Clicked="Binding ClickCommand" />
</StackLayout>

public ICommand ClickCommand { get; }
public string Text { get; set; } = "Click Counter";

int count = 0;
void ExecuteClickCommand()
{
    count++;
    Text = "You clicked {count} times.";
}

However popular C#/XAML/MVVM may be for Xamarin.Forms developers, it would be myopic to think all developers want to do the same thing. In fact, one of the goals with .NET MAUI is to open the funnel and invite developers with variety of mindsets into the fold. Another popular design pattern is MVU (Model-View-Update), favored by lots of React Native or Flutter developers. MVU promotes a one-way flow of data and state management, as well as a code-first development experience that rapidly updates the UI by applying only the changes necessary. .NET MAUI would enable developers to write fluent C# UI to build the visual tree and utilize the MVU pattern to hook things up—actual implementation would likely be a spin-off from the popular Comet UI framework. Here's the same button click counter:

public class MainPage : View
{
    readonly State<int> count = 0;
    readonly State<string> text = "Hello World!";

    [Body]
    View body() => new VStack
    {
        new Text(text)
                .FontSize(32),
        new Button("Increment", () => state.Text = $"Click Count: {clickCount.Value++}")
                .Background(Color.Blue)
                .Color(Color.White)
    };
}

For .NET web developers, Blazor's popularity is through the roof and for good reason. After a long wait, Blazor is fully ready for WebAssembly—developers can write C# front/back and enjoy native web performance. Wouldn't it be cool to reuse Blazor knowledge to build native mobile apps over Xamarin.Forms? That's the goal of Experimental Mobile Blazor Bindings—to bring in the familiar web programming patterns into native cross-platform mobile land. Keep in mind though, there is no WASM play here—what's simply being used is the Razor syntax to render native UI and the React-like Blazor component model. There is a good chance that .NET MAUI may gain the Blazor way of rendering UI—here's the button click counter:

<StackLayout>
    <Label Text="@("You clicked" + count + " times.")" />
    <Button Text="Increment" OnClick="@HandleClick" />
</StackLayout>

@code {
    int count;

    void HandleClick()
    {
        count++;
    }
}

Snorkeling in Molokini

Much of the beauty of Maui lies under the ocean surface. From Maui's popular south shore, boat trips take folks out to a little underwater paradise—the Molokini crater. This crescent shaped tiny island and its surroundings provide a natural habitat to a vast variety of ocean life. Go beneath the surface and you get world class snorkeling experiences. And you might just catch a glimpse of something incredible on your way to/back from Molokini—the mighty Humpback whale.

Similarly, much of what to appreciate about .NET MAUI lies under the surface. Combining the best of .NET Core/Mono and providing a well balanced UI stack is not a small feat. Thanfully, there are some big benefits for developers to look forward to. For the first time, Xamarin aka MAUI developers get CLI (Command Line Interface) tools, in line with the rest of modern .NET. This would mean both visual and command line ways of doing common things—like scaffolding projects, resolving dependencies, building and deploying to devices/simulators. Support for CLI tools has two big implications:

  1. Use of 'dotnet build' tools over MSBuild
  2. Visual Studio Code support

Yes, you read that right. In addition to Visual Studio on Windows and Visual Studio for Mac on MacOS, developers would be able to leverage VS Code for .NET MAUI app building. A lot of developers would prefer the lightness of VS Code as an editor, with all the benefits of code intelligence and deploying apps through CLI commands/VS Code Command Palette.

Need to upgrade Xamarin.Forms apps to .NET MAUI? This will likely not be a difficult process, with try-convert type tooling being promised. Two big Namespace changes to keep in mind:

Xamarin.Forms --> System.MAUI

Xamarin Essentials --> System.Devices

Another huge promised benefit of .NET MAUI would be simplified tooling for developer productivity. Even though you may be building a truly native cross-platform app, your .NET MAUI would be a single point of inspiration—a single SDK-style project. Gone would be platform-specific projects to manage images/resources/fonts for each target platform—.NET Maui projects would share them all and just be smarter during builds. Target Framework Monikers (TFM) would dictate which platforms are supported and multi-targeting would help organize platform-specific code. .NET MAUI will sport a single project for all supported platforms—simple to deploy seamlessly to iOS/Android/Windows/MacOS & more.

MauiSingleProject

Road to Hana

One of the most beautiful parts of Maui is Hana, a mythical land of mountains, waterfalls, history and legends. And the best part of visiting Hana is often the journey—the road to Hana is an incredible drive through twisted roads, breathtaking views and lush rainforest weather. Sure it takes time and you will be enticed to make a lot of stops along the way, but the experience is so worth it.

.NET MAUI holds a lot of promise towards a top-notch consistent UI framework for .NET developers to build cross-platform native apps for mobile and desktop. The high ground comes at a price though—it would be a long, sometimes painful, winding road to the top. .NET MAUI ships with .NET 6, making the present very early days. And of course, .NET MAUI would be entirely open sourced. While developing a UI framework with full transparency is much appreciated by the developer community, there are a lot of opinions to take into consideration out in the open source world. For .NET MAUI to meet everyone's needs, some architectural decisions would need to be made along the way that showcase the balance of respecting community opinions and streamlining tooling for developer productivity.

One very contentious point is XAML (extensible application markup language)—arguably the most popular way of defining the UI visual tree in .NET MAUI. As an evolution of Xamarin.Forms, C#/XAML feels very natural in MAUI and would offer developers the same productivity boost with quality tools. However, the specific flavor of XAML is being debated. Turns out, Xamarin.Forms uses a dialect of XAML that heavily caters to mobile development, and as such is different from the more feature-rich traditional 'Windows' XAML powering WPF/UWP/WinUI platforms. There are community requests to merge the XAML flavors, but this will likely not be an easy endeavor. There are also open questions the .NET MAUI team needs to address about stability, tooling differences with other XAML ecosystems, and ease of customizing custom UI components. A lot of tooling and guidance also needs to be built around the C# MVU pattern or potentially the Blazor way of rendering a visual tree. Code needs to be less verbose and documentation needs to be solid. The good news is, these are super early days for .NET MAUI—the community and engineering teams have the time to do things right. As Hana Maui shows us, it's sometimes not just the destination—the journey can be equally enriching.

Lahaina Sunrise & Sunsets

Maui runs on island time. The sense of panic is often replaced by slowing down to do things right. And few other experiences capture the Hawaiian spirit more than watching sunrises and sunsets from the village of Lahaina. As the gentle ocean waves lap on soft sand beaches and a cool breeze relaxes your soul, you realize it is OK to let go of today. Tomorrow's sunrise brings in fresh promise and zest for life to move forward.

For the past decade, Xamarin technologies have been adored by countless developers. For .NET developers, Xamarin has always provided one of the easiest ways to make cross-platform apps and share code. Without the magic of Mono under the covers and Xamarin's platform reach, .NET developers would not have been able to take their code places, like iOS, Android, Tizen, WPF, MacOS, Linux and more. Sure there have been platform/tooling challenges; but armed with a commitment to make developers successful, the Xamarin teams and the community have always rallied together to make things better. With the advent of .NET MAUI, some may be sad to see the sunset for the beloved Xamarin brand.

But fear not—the next sunrise is just going to be better. In a testament to Xamarin's engineering efforts, much of Xamarin is now being rolled up into the core of .NET and provides more developer confidence.

Xamarin.iOS --> .NET for iOS

Xamarin.Android --> .NET for Android

Since the Native Xamarin is essentially a shim over native APIs to use shared C# code, nothing much needs to change—simply use within .NET and with preferred tooling. Xamarin.Forms evolves into .NET MAUI and gains additional platform support. In addition to iOS/Android, developers will be able to build native desktop apps for Windows and MacOS—a result of maturity of tooling and confidence in platform support.

MauiPlatformSupport 

The 50th State

Hawaii became the 50th state of the United States of America in 1959. Part of the Polynesian subregion of Oceania, Hawaii is the only island state in U.S. Aside from the strategic advantage in the Pacific ocean, Hawaii's statehood has relaxed consequences for Americans—freedom of movement for island and mainland residents alike. No passports needed. Currency, language and general way of life is the same. What you are used to just works—only with added flair.

Similarly, .NET MAUI is just part of .NET. All your tools just work. All your development experiences just carry forward. The funnel is being widened to include more ways of building the cross-platform UI stack.

Use something in Xamarin today and have concerns for tomorrow? What if you were using polished performant UI components, like Telerik UI for Xamarin? Relax. It will all evolve and work seamlessly in .NET MAUI. Fond of the Blazor component model to build native cross-platform mobile apps? Telerik UI for Xamarin already offers experimental Blazor bindings for rendering flexibility. Everything from Telerik UI for Xamarin will work tomorrow—just better.

Relief 

The Aloha Spirit

Aloha is the Hawaiian word for love, affection, peace, compassion and mercy. While commonly used as a simple greeting, Aloha has a deeper cultural and spiritual significance to native Hawaiians, for whom the term is used to define a force that holds together existence.

.NET MAUI should be welcomed in the same Aloha spirit. No one is moving your cheese. Tooling and platform support get better. Developers get more flexibility. .NET MAUI is a while away—previews would start showing up end of 2020 with final bits in 2021. But the time to engage is now. Developer community and the .NET MAUI teams have a nice runway to get things right before takeoff. Let's all chill and look forward to a better tomorrow. Aloha!

PS: Most images courtesy of Microsoft.


Blue Mockingbird Vulnerability Picks up Steam—Telerik Guidance

$
0
0

The Blue Mockingbird malware attack, which is compromising the security of many web applications, including Microsoft Information Services, SharePoint and Citrix, is also targeting old Telerik UI vulnerabilities that have already been fixed.

The attack often uses the known vulnerabilities CVE-2017-11317 and CVE-2019-18935 to upload and execute the malicious software to versions that have not been upgraded to the latest version of the Telerik UI for ASP.NET AJAX (also known as RadControls for ASP.NET AJAX).

Both of the vulnerabilities are already fixed, and, when they were found, Progress notified all of our active and inactive customers with instructions and mitigation steps so they could secure their apps. See the following blog posts:

Am I Vulnerable?

You can see whether your app is vulnerable by opening its web.config and looking for the type="Telerik.Web.UI.WebResource" handler.

If you have either of the handlers below registered (make sure to look for the type attribute), you are using the Telerik UI for ASP.NET AJAX (Telerik.Web.UI.dll) suite and your app might be vulnerable to CVE-2017-11317 and/or CVE-2019-18935, and you should keep reading.

  <system.web>
    <httpHandlers>
      <add path="Telerik.Web.UI.WebResource.axd" type="Telerik.Web.UI.WebResource" verb="*" validate="false"/>
    </httpHandlers>
  </system.web>
  <system.webServer>
    <handlers>
      <add name="Telerik_Web_UI_WebResource_axd" path="Telerik.Web.UI.WebResource.axd" type="Telerik.Web.UI.WebResource" verb="*" preCondition="integratedMode"/>
    </handlers>
  </system.webServer>

How to Prevent the Vulnerability?

To make sure you are not vulnerable we recommend that you upgrade to R1 2020 or later, as shown in the diagram below:

Security diagram

You can find more information in the following dedicated articles:

Which Telerik Version am I Using?

There are three easy ways to check the version of the Telerik.Web.UI.dll assembly, which is the main file of the Telerik ASP.NET AJAX suite:

  • For ASP.NET WebApplication types of projects, open the csproj file and search for “Telerik.Web.UI” - the path in the HintPath will show you the location of the Telerik.Web.UI.dll file
    <Reference Include="Telerik.Web.UI">
              <HintPath>\bin\Telerik.Web.UI.dll</HintPath>
             …
           </Reference>

    Once you have the path from the HintPath, navigate to the Telerik.Web.UI.dll in Windows Explorer, right click, choose Properties -> Description tab and find out the version in the File Version row:

    Telerik.Web.UI.dll Properties 

  • For ASP.NET WebSite types of projects, go to the bin folder of the web project and right click on the Telerik.Web.UI.dll -> Properties -> Description -> see the version in the File version line.
  • Inspect the version in the GAC as explained in the Referencing Assemblies from the GAC article

Feedback and Questions

If you have any questions you can reach out the Telerik support via the public Telerik ASP.NET AJAX forum, by opening a General Feedback ticket or via the support ticketing system (for everyone with an active subscription).

Telerik UI for Blazor 2.15.0 Includes New ButtonGroup, ToggleButton, Grid Updates and More

$
0
0

The latest release of Telerik UI for Blazor features new native components in ButtonGroup and ToggleButton, updates to the Grid, Chart, Treeview and More. Read on for all the highlights.


It is June and here comes another release of Telerik UI for Blazor that brings two new native Blazor components—Button Group and Toggle Button—multiple new features to the Grid, Chart, TreeView, Textbox and more. Let’s dive into the new 2.15.0 release and see in detail the new goodies including new Grid Custom Filtering, Grid Row-Click Events, support for dynamic ExpandoObject, and binding to DataTable, all ready to be plugged and played in your Blazor Server and WebAssembly apps!

New Blazor Components

Blazor Button Group Component

ButtonGroup Overview

The ButtonGroup component is a UI container for buttons, which lets you select single or multiple button instances, and respond to the selection and click events. The buttons within the ButtonGroup fill up the container, match the styling according to the chosen theme and provide the common button features like images and icons, as well as other parameters and attributes.
Telerik UI for Blazor ButtonGroup Component

Telerik UI for Blazor ButtonGroup Component

To use the ButtonGroup component in your Blazor applications, you need to add the TelerikButtonGroup tag, and inside it add the corresponding <ButtonGroupToggleButton> or <ButtonGroupButton> tags that denote each button, as shown in the example below:

<TelerikButtonGroup>
<ButtonGroupButton>First button</ButtonGroupButton>
<ButtonGroupToggleButton>Second button</ButtonGroupToggleButton>
</TelerikButtonGroup>

ButtonGroup Selection

Using the SelectionMode setting of the ButtonGroup component, you can enable single or multiple selection of its ButtonGroupToggleButton instances.

ButtonGroup Customization and Styling

You can customize and style the ButtonGroup and its individual buttons using various styles, images, sprites, font icons and conditional formatting. Check out an example of how to completely transform a button group look.

ButtonGroup Events

The buttons in the ButtonGroup component provide two handy button/toggle button events:

  • OnClick fires when the user clicks or taps the button. You can use it to invoke async logic such as fetching data or calling a service.
  • SelectedChanged fires when the user changes the state of the button by clicking it (or by using Space or Enter). You can use it to call local view-model logic (applicable for a ButtonGroupToggleButton)

ButtonGroup Keyboard Navigation

The ButtonGroup component has built-in keyboard navigation allowing end users to easily navigate in Blazor applications, focus and click on buttons using their keyboard.

Blazor Toggle Button

ToggleButton Overview

The ToggleButton lets you perform a toggle actions (such as on/off) on the two states of the component.

Telerik UI for Blazor ToggleButton Component

Telerik UI for Blazor ToggleButton Component

To add a Telerik UI for Blazor ToggleButton to your Blazor app, use the <TelerikToggleButton> tag.

<TelerikToggleButton @bind-Selected="@IsSelected">
Selected: @IsSelected
</TelerikToggleButton>
@code {
boolIsSelected { get; set; }
}

ToggleButton Styling

You can use an image, sprite or font icon in the toggle button so that you customize its look and make it easier for users to interpret its purpose.

ToggleButton Events

The ToggleButton component exposes the following events to let you handle clicks and selection in Blazor apps.

  • OnClick fires when the user clicks or taps the button. You can use it to invoke async logic such as fetching data or calling a service
  • SelectedChanged fires when the user changes the state of the button by clicking it (or by using Space or Enter). You can use it to call local view-model logic

ToggleButton Keyboard Navigation

Like most of the Telerik UI for Blazor components, the ToggleButton has built-in keyboard navigation allowing end users to easily focus and click on buttons using their keyboard.

Blazor Components Enhancements

With every new version that we ship with Telerik UI for Blazor, we aim to give our love to the Grid component, and in the 2.15 release we added several features requested via our feedback portal.

Blazor Grid Component New Features

Grid Custom Filter

When working with data one thing is sure—it grows, and users needs to be able to quickly find their relevant records. And because filters do not always come in their simple form such as show me records for data smaller than DateTime.Now, in this release we added the flexibility to let you customize data filtering.
Telerik UI for Blazor Grid Custom Filtering - Multiple Operands

Telerik UI for Blazor Grid Custom Filter Menu—Apply Multiple Operands

You can apply as many logical operands as needed and implement any custom filtering criteria that is defined by your project requirements using the filter menu template.

Telerik UI for Blazor Grid Custom Filtering - Checkboxes

Telerik UI for Blazor Grid Custom Filter Menu—Apply Multiple Checkbox with Filter Menu Template

In addition to the Grid custom filter menu, you can also implement custom filtering on Grid rows using the filter cell template.
Telerik UI for Blazor Grid Custom Filter Row

Telerik UI for Blazor Grid—Custom Row Filter

Code examples on how to customize filtering using the <FilterMenuTemplate> and <FilterCellTemplate> templates can be found on our dedicated custom filtering demos for menu and rows.

Grid Row Click Events

We have exposed two new events in the Grid, so that you can implement custom business logic in your code that handles user clicks on Grid rows.

OnRowClick and OnRowDoubleClick events fire when user clicks and double-clicks a Grid row, respectively. Their event handlers receive the GridRowClickEventArgs object, providing the model of the clicked row in the Item field giving you flexibility to show details, load data on demand, display related data and perform various custom actions to the clicked rows.

Grid Support for ExpandoObject

Don’t have a strongly typed model of your data—no problem, the Telerik UI for Blazor Grid can easily accommodate dynamic data types. Checkout our sample repo on how to bind Grid to ExpandoObject in Blazor apps.

Bind Grid to DataTable

For those of you that have backend returning DataTable, you can now bind the Grid to DataTable data and have all the cool Grid built-in features with ease—sorting, paging, filtering and even editing.

Check out an example of how to bind the Grid in Blazor applications to a DataTable.

Blazor TextBox Component New Features

Textbox Additional Parameters

The latest updates to the Textbox component allow you to easily customize multiple elements of the text input, such as: AutoComplete, Placeholder, Name, Title and TabIndex.

<TelerikTextBox Name="email"PlaceHolder="john@smith.com"TabIndex="3"InputMode="email"Id="email"AutoComplete="on"Width="180px"></TelerikTextBox>

Textbox Password

The Textbox component now has new parameter, Password, which when set to true gives you the option to mask the characters in the input and give it a proper password look.

Telerik UI for Blazor TextBox Password Property

Telerik UI for Blazor Textbox Password Property

Blazor TreeView Component New Features

TreeView Selection of Nodes

The TreeView component node selection can be configured by setting the SelectionMode parameter to a member of the TreeViewSelectionMode enum, which takes one of the three options:

  • None—disable the node selection (default)
  • Single
  • Multiple (using Ctrl or Shift key)

Telerik UI for TreeView Node Selection

Telerik UI for Blazor TreeView Selection of Nodes

TreeView Node Click Events

Two new events have been added to the component to enable flexibility when selecting and working with the TreeView nodes:

  • OnItemClick—fires when the user clicks (or presses Enter) on a node (item) of the TreeView.
  • SelectedItemsChanged—the SelectedItemsChanged event fires when the selection is enabled and the user clicks on a new item.

Blazor Chart Components New Features

Chart Tooltips

You can enrich your Blazor charts with three out-of-the box Chart tooltip-ingoptions for data points:

  1. Specific tooltip for each <ChartSeries>
  2. Common tooltip for all chart series
  3. Or a shared tooltip which provides summarized information of all data points from the hovered category

To enablespecific tooltips for the data points of each individual series, you need to include the <ChartSeriesTooltip> tag inside the <ChartSeries> tag, and set its Visible parameter to true.

To enable the same tooltip for all chart series, add the <ChartTooltip> tag inside the <TelerikChart>, and set its Visible parameter to true.
Telerik UI for Blazor Chart Tooltip - Single

Telerik UI for Blazor Chart Single Tooltip

To enable the shared tooltip in Telerik UI for Blazor Charts, add the <ChartTooltip> tag inside the <TelerikChart> tag, and set its Shared and Visible parameters to true.
Telerik UI for Blazor Chart Tooltip - Shared

Telerik UI for Blazor Chart Shared Tooltip

Telerik UI for Blazor Chart tooltips allow full customization of their appearance: background, color etc. and the content that is rendered in the tooltip via templates/ shared templates.

Both the chart tooltip Template and SharedTemplate allow you to define custom business logic, render HTML and give you access to the context parameter. In the Template it provides information about the current data point such as: CategoryIndex, SeriesIndex, SeriesName, DataItem, FormattedValue, and in the SharedTemplate it exposes Category (renders the name of the Category) and Points (a collection of data for each series data point in this category).

Click Event on a Chart Element

And to make things more interactive, the Telerik UI for Blazor Chart component exposes events that let you handle user clicks on chart series.

Check out the OnSeriesClick event with Telerik UI for Blazor charts.

Download Telerik UI for Blazor 2.15.0

To see in action all that’s mentioned in the release blog post, head over to the Telerik UI for Blazor page, download the 2.15.0 version of Telerik UI for Blazor to spice up your Blazor applications. Keep telling us what’s working well, what needs to change and what you’d like to see next in the dedicated Blazor feedback portal or in the comment section below!

Thank You!

As always, the entire team working on Telerik UI for Blazor at Progress is thankful to you for being involved and helping us grow and making Telerik UI for Blazor bigger and better.

Grab Your Users' Attention with the WPF RadCallout in Action

$
0
0

Need to display meaningful information, be it alerts, hints, tips, etc? Then greet the hero of R2 2020 Release of Telerik UI for WPF—the RadCallout control.

Remember how we all thought that buttons are everywhere? Well, while developing the hero of today’s talk, I changed my mind about that. I started seeing Callouts everywhere, but there was no other like our star—one of the shiniest accents of the R2 2020 release of Telerik UI for WPF. Everybody, please welcome the brand-new RadCallout.

I’m sure that all of you have already met a callout in your lives, at least once. Some of you may not know that it’s referred to as a callout. Others might relate it to the thought or speech bubbles used in comic strips. All golden Microsoft Office fans surely still remember Clippit. The cute cartoon paperclip, seen in versions 2000 through 2003, and its helpful callouts. But what’s so special about ours? Let’s call out the RadCallout and find out.

RadCallout

What do you see? A tiny, fluffy, cloudy text box with a small tail that you can point to different locations. Pretty simple, huh, yet so satisfying and unbelievably (at first sight) powerful. Let me guide you through its superpowers.

Unlimited Box Shapes Variety

I could not help but start exactly with this one. Since the callout control is a content control, designed to display a piece of meaningful information, be it alerts, hints, tips, etc., I believe the shape of it is the part responsible for the best representation. You can’t warn your users that if they don’t change their expiring password, they may not be able to log in ever again, in the shape of a heart for example, can you? Let’s cut the small talk and explore the shape options that the RadCallout offers.

The control comes with five built-in shape types, plus one very special option. The CalloutType is an enumeration and it allows the following values—Rectangle, RoundedRectangle, Ellipse, Cloud, Kaboom (the one jazzy, glaring shape with the many lines connecting to form numerous triangular edges).

The last option is intentionally out of the list of built-in shapes—it's the Custom shape option. The one responsible for the heading of this section, the one giving you the un-limitedness. Using it, you need to provide a custom geometry. I really love it, because it allows you to get into your stride and build a very cool and unique shape for your callout.

Callout Shapes (ColorThemeGenerator)

Explore them all and play with the themes and colors in the Color Theme Generator application. Like the rest of the controls from the Telerik UI for WPF, the Callout control comes with a set of themes you can use to create a consistent and modern looking user experience.

P.S. The last one of the custom callout types is catchy, isn’t it? And since I like you, I’ll show you how it’s done:

<telerik:RadCallout
Width="250" Height="170"
Margin="10 0" CalloutType="Custom"
MeasurePathWithInfinity="False" Stretch="Fill" ArrowType="None"
Geometry="M590.7,100.7c.5-3.1,1.1-6.2,1.8-9.3a2.0,2.0,0,0,0-.7-2.4c-7.4-5.7-15.8-9.0-25.4-8.2-10.5,1-18.5,6.0-23.2,15.7-3.7,7.8-3.8,16-2,24.3a2.3,2.3,0,0,0,1.7,1.7c2.1.8,4.3,1.7,6.3,2.7a30.7,30.7,0,0,1,7.2,4.7,6.4,6.4,0,0,1-1.9-.3,86.4,86.4,0,0,0-17.4-3.3c-8.5-.6-16.8.1-24.6,3.6-9.3,4.2-15.8,11-18.3,21.1-2,7.9-.8,15.5,2.4,22.9,3.7,8.0,9.6,14.2,16.8,19.2,2,1.4,4.1,2.6,6.1,3.9,5.2-3,10-6.1,15.5-7.8a7,7,0,0,1-1.2,1.3,110.6,110.6,0,0,0-8.0,7.8c-7.5,8.8-11.2,19-10.1,30.7,1.5,16.1,13.5,30.8,29.7,36.0a47.3,47.3,0,0,0,30.4-.5,44.6,44.6,0,0,0,9.6-4.2,60,60,0,0,1-2.4-18.3,11.0,11.0,0,0,1,1,2.1c1.2,3,2.2,6.1,3.7,9.1a48.5,48.5,0,0,0,14.8,18.5c9.7,7.2,20.5,9.9,32.4,7.1,12.4-2.9,21-10.4,25-22.7a36.1,36.1,0,0,0,.5-19.4c-.7-3.1-1.9-6.1-2.9-9.2h0c.8-.5,1.3.1,1.8.6,1.6,1.7,3.2,3.4,4.8,5.3a2.9,2.9,0,0,0,2.8,1.3A71.5,71.5,0,0,0,686.7,231c10-3.7,18.2-9.8,24.1-18.9,7.5-11.7,9.4-24.6,6.6-38.2-3.4-16.1-12.3-28.2-27.0-35.8a53.1,53.1,0,0,0-23.6-5.5c-1.3,0-2.6,0-3.9,0a1.9,1.9,0,0,1,1.0-1.1c3.6-1.2,7.3-2.6,11.1-3.7,1.3-.4,2.0-.9,2.1-2.3.1-2.3.5-4.7.6-7.1.4-9.6-1.2-18.8-6.3-27.1-8.0-13.1-20-19.4-35.4-18.5-8,.4-15.2,3.3-22,7.5-8.5,5.3-15.5,12.4-21.6,20.5-.4.6-.9,1.2-1.7,2.2A13.1,13.1,0,0,1,590.7,100.7Zm-63.8,17.7L477,72.3a13.9,13.9,0,0,0-1.5-1c1.0-.5,1.6.3,2.2.8q10.5,7.7,21.0,15.4l34,25a6.3,6.3,0,0,0,2.4,1.2c-.2-.7-.4-1.4-.6-2.2-2.1-6.3-3-12.8-1.2-19.3,2.4-9,8.2-15.1,16.8-18.4,13.3-5.1,25.8-3,37.5,5.1.6.4,1.2.9,2.3,1.6,1.8-21.2,3.3-42.1,5.5-63,1.3,20.5,2.7,41.1,4.1,62.2,1-.8,1.6-1.3,2.2-1.8,8.1-7,17.4-12,28.1-13.5,15.8-2.2,29.7,1.7,40.9,13.3,7.7,8,11.2,17.9,11.5,28.9.0,3-.3,6.0-.5,9.0-.0.8-.1,1.7-.2,2.9,1.1-.4,2-.8,2.8-1.2l78.2-35.9c.9-.4,1.9-.7,2.9-1.0a30.6,30.6,0,0,1-2.6,1.9q-37.2,21.6-74.5,43.1c-.8.4-1.6,1-2.7,1.6a9.8,9.8,0,0,0,1.4.5c18.6,3.7,31.1,15,38,32.3a59.9,59.9,0,0,1,0,45.6c-5.6,14.1-15.8,24-30.1,29.3a60.4,60.4,0,0,1-17.0,3.7c-.8.0-1.6.1-2.8.3.5.7.9,1.3,1.3,1.7q21.2,25.6,42.6,51.2a10.1,10.1,0,0,1-2-1.2Q695.6,271,674,250.7l-4.8-4.4c-.7.8-.4,1.7-.4,2.5a38.8,38.8,0,0,1-4.8,19.8,39.8,39.8,0,0,1-21.0,18,44.7,44.7,0,0,1-35.7-.7,38.3,38.3,0,0,1-15.4-12.5c-.3-.4-.6-.9-1-1.3a3.9,3.9,0,0,0-.7-.4c-5.7,27.5-11.1,55.0-17.1,82.5,2.6-28.3,5.2-56.6,7.8-85.2a10.6,10.6,0,0,0-1.5.6c-11,7.2-22.7,8.2-34.9,4-16.4-5.7-28.1-16.7-34.6-33a37.3,37.3,0,0,1,0-29c.5-1.3,1.2-2.5,2-4.3l-61.9,17.3c-.0-.1-.1-.2-.1-.4l63.2-27-3.5-2a55.6,55.6,0,0,1-18.8-16.6c-13-18.6-6.8-43.2,13.3-53.6a44.4,44.4,0,0,1,21.5-4.8c.7,0,1.4,0,2.1,0,.1,0,.2-.1.6-.2C527.5,119.2,527.2,118.8,526.8,118.4Z">
    <telerik:Label Content="CalloutType - Custom, ArrowType - None" FontSize="10" Margin="0 0 0 15"/>
</telerik:RadCallout>

Customization Capabilities

Don’t be shy and always aim beyond the basic settings like spacing, background and border color. Of course, the RadCallout allows it. Adjust everything you wish to end up with the perfect callout for your app. Don’t just change text color and style, or the vertical and horizontal offsets.

Be brave, play with the properties which determine the look and feel of the connection point for the callout body—the arrow. Check out the following properties:

  • ArrowBasePoint1—the first base point of the arrow geometry
  • ArrowBasePoint2—the second base point of the arrow geometry
  • ArrowAnchorPoint—the anchor point of the arrow geometry

So far, so unclear, but let me try to explain.

The above properties for customizing the arrow of the RadCallout’s geometry are all of type Point, representing relative coordinates (between 0 and 1). For example, X = 0 and Y = 0 means the top-left point of the callout body and X = 1, Y = 1 - the bottom-right point. In the following figures you can see the default values of the properties [0.25, 0.5], [0.75, 0.5] and [0.5, 1.25].

Important thing! The width and height of the callout applies only to the body of the geometry, without the arrow. Why? Because this makes it very easy to keep a fixed size of the main shape, while making bigger arrows which exceed the shape size. How to make those bigger arrows—simply set big Y of the ArrowAnchorPoint. To make the arrow included in the callout size, you can set MeasurePathWithInfinity property to False.

Arrow Points Defaults

Default Arrow Point Coordinates

Arrow Points Custom

Custom Arrow Point Coordinates

The Red, Green and Blue points in the figures are not part of the control. Demonstrative purpose only.

Usage Options

XAML Usage

We’ve already stepped into the possible ways of using the RadCallout in a WPF app. In the above code snippet with the custom geometry, I demonstrated the XAML declaration of the control. The choice of a parent container in this case is completely in your hands—choose the best one for displaying your content in the most relevant way.

Now, I want to dig deeper into the other possibility. Showing the callout in an animated Popup, using the CalloutPopupService class.

Popup Usage

Want to show the callout above your application content and enable interaction via actions such as clicking, hover, keyboard navigation, etc.? Sure, then the CalloutPopupService class will be of great help as it provides the needed methods and events to do so. Use it for showing the callout, closing a given callout, closing all callouts at once and disabling the popup animation. Believe me, this is just a brief intro into this wonderful option. This service class goes together with the CalloutPopupSettings class.

The CalloutPopupSettings class has a really long list of powerful properties that you could benefit from to completely configure the popup up to your liking. You can choose whether the popup will be auto centered, or auto closed, should it move with the parent placement target window, should it show in the intended placement position in case of exceeding the monitor boundaries.

Of course, I should’ve started with the Placement options, represented by the PlacementMode enumeration, allowing the following values—Absolute, Relative, Bottom, Center, Right, AbsolutePoint, RelativePoint, Mouse, MousePoint, Left, Top, Custom.

Animation configuration options are also worth mentioning as they greatly contribute to the customization capabilities of the control. I’ll even put them in a separate section, coming right up… or actually down.

Whoa, that was a long list represented quickly… (for such a tiny at first sight control).

Callout Popup Animations in Action

If you are already intrigued by the popup service, make sure to play around with the animations to achieve the best experience for the end users. I will be more than glad to guide you through it.

When setting up the animation of your callout popup, you can choose from the CalloutAnimation enumeration. It allows the following values: None, Fade, Move, FadeAndMove, Reveal, FadeAndReveal, Scale, FadeAndScale.

You can specify different animation types for the callout popup by using the ShowAnimationType and CloseAnimationType properties. Also, you can be the one in control for the durations of these animations, as well as their delays.

In case you’ve missed the blog post for the R2 2020 release of Telerik UI for WPF, I’ll drop the GIF, showing the animations in action:

Callout Popup Animations

From Intro to Epilogue in a Blink

This has already started to look like a whole introduction of a book, so I think it’s time to close the curtains on this lovely blog. But… before this.

When using the RadCallout (I’m sure you will), think of it as your best helper for making it easy to highlight important information. Use it to alert customers to a special discount, highlight a testimonial or add weight to particularly important text content. Spotlight free shipping, discounts, price matching and more. Draw attention to unique selling points and important product details and benefits. Whatever you like. Just use it wisely to make your application content stand out.

Speaking of wisdom, the best thing would be to benefit from the outstanding possibility to integrate the Callout control with other UI controls from the Telerik UI for WPF such as Maps, Charts, Tooltip, Slider, etc. For some of those integrations (as well as others), make sure to check the documentation and the awesome control examples in our WPF demos application.

Share Your Feedback

We will never get tired of encouraging you to share your thoughts with us by dropping us a comment below, or using the Feedback portal about UI for WPF, because we highly value your honest feedback. It really matters!

In case you haven’t already done so, do not hesitate to try out the latest:

Try Telerik UI for WPF

Time to Boost Your HamburgerMenu! Multi-Level Items Have Arrived

$
0
0

The new version of Telerik UI for WPF's HamburgerMenu recipe is here. The RadNavigationView now supports UWP-like multi-levels! Learn how to achieve a hierarchical menu.

Remember how I deliberately let the secret about mastering the navigation within your WPF apps just slip? I did not hesitate a minute to share with you the recipe of our HamburgerMenu. But you know what—I like making my favorite recipes taste better every time. That’s why I’m so thrilled to announce the new stuffing of this one. Let me introduce you to the multi-level hierarchy support of RadNavigationView!

Since the R1 2019 Release, when the first version of the HamburgerMenu recipe was created, a lot of requests and feedback was received. I am so grateful for that. Thanks to all of you, looking for multi-level items (like in UWP), the RadNavigationView control now supports it! Let me show you how to achieve hierarchical menu visualization.

Setting Up Hierarchy

Each RadNavigationViewItem element now has an Items collection. It can be populated with numerous RadNavigationViewItem elements, thus allowing multilevel items definition. XAML lovers, check it out below:

<telerik:RadNavigationView PaneHeader="Mail"> 
<telerik:RadNavigationView.Items>
<telerik:RadNavigationViewItem Content="Accounts">
<telerik:RadNavigationViewItem.Items>
<telerik:RadNavigationViewItem Content="Viktoria Grozdancheva (vgrozdancheva@prgs.com)" />
<telerik:RadNavigationViewItem Content="John Doe (jdoe@prgs.com)" />
</telerik:RadNavigationViewItem.Items>
</telerik:RadNavigationViewItem>
<telerik:RadNavigationViewItem Content="Folders">
<telerik:RadNavigationViewItem.Items>
<telerik:RadNavigationViewItem Content="Inbox"/>
<telerik:RadNavigationViewItem Content="Drafts"/>
<telerik:RadNavigationViewItem Content="Sent Items"/>
<telerik:RadNavigationViewItem Content="Deleted Items"/>
</telerik:RadNavigationViewItem.Items>
</telerik:RadNavigationViewItem>
</telerik:RadNavigationView.Items>
</telerik:RadNavigationView>

Data Binding lovers, don’t you be worried. The HamburgerMenu can also be populated with business objects via its ItemsSource property. The DisplayMemberPath and ItemContainerStyle properties can be used to further customize the items and allow sub-items. Check the Hierarchical Data Binding article of the control for more information and examples.

So much talking and not a single preview of the menu’s multi-levels in action… Shame on me.

NavigationView Multi-Levels GIF

P.S. This awesome GIF is not a preview of the first code snippet, it’s from our precious Telerik UI for WPF Controls Demo application. Don’t hesitate to check it out and play with the Sub Items demo of the NavigationView control.

Oh, one thing that's worth noticing about the GIF is that when I click directly on the expand/collapse icon, the item does not get selected—this way only the expanded or collapsed state is triggered. Clicking everywhere else in the bounds of the item will trigger its selected state. Thought you might want to know it .

Customization Capabilities

The NavigationView sub-items are totally tailor-made to meet your business needs. Let’s peek at the benefits of the hierarchical hamburger menu together.

Expand/Collapse Icons

First thing that I’d like to be in control of are the expand and collapse icons, of course. For this purpose, the ExpandedIcon and CollapsedIcon properties of the RadNavigationViewItem come in handy. The default icon template of the item uses RadGlyph, so you can set the properties to a glyph string from the glyphs reference sheet. My favorite cheat-sheet.

Oh, you can also experiment with the expand/collapse animations if you dare!

Nested Items Indentation

All child items can have a different than the default horizontal offset (indent). Simply set the SubItemsIndentation property of RadNavigationView to the desired value and you’re all done. You can play with this one using the Configurator part of the Sub Items demo that I mentioned a few lines above.

Single/Multiple Expanded Items

The default behavior of the RadNavigationView allows expanding multiple RadNavigationViewItem elements with child items at once. Need to restrict that to only a single expanded item at a time? Sure, just set the AllowMultipleExpandedItems property of RadNavigationView to False.

Flying Out to NavigationView’s Flyout

What about having a collapsed pane and the NavigationView is in its Compact or Expanded DisplayMode? Where do all nested menu items go?

Sub-Items Flyout

That’s right, they fly out to the east coast of the pane . Now, seriously, clicking on a parent item displays its children (the collapsed RadNavigationViewItems) in a flyout which has a nice animation by the way to make sure the flight is smooth.

Some of you asked for direct access to the sub-items on hovering over a main menu entry. This can be achieved by changing the default ClickMode of the parent item to Hover. Easy-peasy.

Sub-Items Events

A few words about the events that are fired when expanding and collapsing the items. These actions fire the ItemExpanded and ItemCollapsed events of RadNavigationView. Additionally, the RadNavigationViewItem exposes Expanded and Collapsed events, which are fired before the previous two.

Closing Words

You know I’m only human and might have missed something which you consider important. Therefore, don’t forget to check out the Hierarchy and Hierarchical Data Binding articles of the NavigationView as well.

Okay, that’s it, guys. Thanks for taking your time to read my blog! I hope the multi-level hierarchy support of the HamburgerMenu met your expectations and you’re eager to:

Get the Latest Telerik UI for WPF

I’m sure you’ll try it out. And when you do, I’ll be there to read your honest feedback. Don’t be shy to share it in the comment section below or head to our Feedback portal.

Happy coding and to make it even happier, explore all new controls, features and improvements of the R2 2020 release of Telerik UI for WPF.

New FREE Ebook: A Quick Guide to Expert .NET Reporting Tools

$
0
0

Visualizations have been helping people understand data for centuries. Clear and accurate reporting tools play a pivotal role in any business decision today and help companies digitize and streamline their reporting process.

Today’s data visualization tools, also called reporting tools, go beyond the standard charts and graphs used in the earlier periods. They can display data in more sophisticated ways such as infographics, dials and gauges, geographical maps, heat maps, and detailed bar, pie, and other charts. This is due to the advancement of digital information in today’s business environment.

Business processes and people are moving information at incredible speeds thanks to the adoption of digital information. This has forced businesses to adopt digital workflows to exchange information quickly. An example of this might be stock brokerage or bank transactions are done all digitally with the only bottleneck being data transfer rates.

An organization like a bank or an accounting firm or any other company which uses data for business decisions requires reporting tools that meet specific criteria to operate these high-end digital workflows. A proper reporting solution is of the utmost importance to ensure streamlined processes and accurate information is delivered.

Our guide to expert .NET reporting tools was just published and it is ready for FREE download.

In this ebook, Eric Rohler, Senior Technical Engineer at Progress, offers a six-step framework to help you choose the best reporting tool for your organization. He reviews the main functionalities of reporting solutions and shares best practices for everything you need to know to deliver beautiful, powerful, interactive and reusable reports. 

Learn how to apply the top six criteria when assessing a reporting tool:

  • Presentation
  • Powerful
  • Productive
  • Pliable
  • Performant
  • Price

Deep dive in different stages of reporting—from report creation to styling to data sources to integration to rendering and accessibility. Take advantage of expert advice on successful integration between Reporting tools and web (Blazor, ASP.NET Core, ASP.NET MVC, ASP.NET WebForms, Angular, React and more) or desktop applications (WPF, WinForms, UWP) and many practical examples and use cases.

Download FREE Reporting Ebook

If you download the ebook, we’ll soon follow up with an invitation to a dedicated reporting webinar and more materials on the topic. Stay tuned!

Viewing all 1954 articles
Browse latest View live